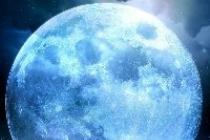
On November 14, we will have another supermoon. For astronomers, this may be a fairly ordinary event, but for photographers, a supermoon is an opportunity to take spectacular pictures of the moon.
Ahead of the biggest supermoon of 2016 (a supermoon that happens once every 48 years), here are a few tips on how to photograph the moon in all its glory.
Without going into details, a supermoon is a phenomenon when the Moon is at its closest point to the Earth, due to which, for an observer from Earth, it becomes 14% larger and 30% brighter. The Supermoon is a great time to experiment and take some spectacular photos of the moon.
How to Photograph the Moon: Equipment Needed
To photograph the moon, you do not need to have special equipment. For example, the shot below was taken with an 18-135mm kit lens and then cropped so that the moon fills the frame:
So what you need:
- Digital SLR camera with a zoom lens (ideally you want a telephoto lens) or
- Cable release, remote control or self-timer function.
How to Photograph the Moon: Camera Setup
Switch the camera to Manual or Shutter Priority (TV) mode.
Set sensitivity between 100 and 200 to minimize noise. Choose a shutter speed depending on the ambient light and the effect you want to achieve.
Since the Moon is a very bright source of light and is moving quite fast, you need to choose a fast shutter speed to get an unblurred image of the Moon.
For shooting, try using the F/16 Rule: that is, at f/16, the shutter speed should be the reciprocal of the ISO sensitivity. For example, if you are shooting at ISO 100, you should select a shutter speed of 1/100s (or 1/125 depending on your camera model).
An aperture of f/16 may be too narrow depending on the lighting conditions - in this case, open it slightly to f/11. In any case, you will need to take test shots and choose the settings that give you the best results. The main thing to keep in mind is that the best results can be obtained at apertures of f/8 and above.
Be sure to shoot in RAW format, as this will give you more room to process the resulting photo.
How to Photograph the Moon: Focus Settings
For Supermoon photography, manual focusing is best, as autofocus tends to not perform well in low-light conditions. Manual focus, on the other hand, will allow you to focus exactly where you want.
Set the focus mode switch on the lens or camera body to the MF position. Using Live View mode with the image zoom feature will help you select the most appropriate focus point, and eliminate the need to try to focus the camera by squinting into the viewfinder.
If you want to get very sharp photos, you can resort to, which is great not only for macro photography, but also for photographing the moon.
How to Photograph the Moon: Metering Settings
Do you want to get a clear picture of the moon against a contrasting black night sky? The mode will help you achieve the desired result, as it will measure a very small part of the scene - usually the same as the center focus point.
Spot metering works best with zoom lenses because it allows you to frame the image so that the exposure is not affected by extraneous light outside the moon (stars, street lights, etc.).
If there are other objects in the frame besides the Moon and you want to achieve a silhouette effect, then the most suitable would be.
By the way, if you want to expand the capabilities of your zoom lens and do not spend money on purchasing a telephoto lens, you can use a teleconverter. But be aware that the use of a teleconverter may affect the performance of the lens with which you have combined it, and the final image may not be as sharp as you expected.
How to Photograph the Moon: Eliminate Vibration
Blurry photos can result not only from the lack of a tripod, but also from the vibrations that occur when the shutter is released. In order to avoid this, you must use the cable release or the remote control of the camera.
Moon has always attracted people's attention. The mysterious distant planet has always been surrounded by clouds of myths, rumors and secrets. Sometimes lunar landscapes are so beautiful and expressive that even novice photographers uncover their simple soap dishes (or mobile phones) in the hope of capturing this miracle. Unfortunately, the results of such spontaneous filming are often more than depressing. In this article we learning to photograph the moon.
When is the best time to photograph the moon?
It's no secret that the moon can be seen even during the day. Sometimes a narrow sickle suddenly appears in a clear cloudless sky, sometimes a little more. But we will never see the full moon during the day. Why?
Everything is very simple. To see the full moon, we must have the sun on the opposite side, that is, beyond the horizon. Therefore, we must have the night, or at least the evening. Photographing the moon during the day is not very interesting. She is dull, dull and expressionless.
On a dark night, the moon is the easiest to photograph. She is bright and clear. Since the sky around her is almost black, you don't have to worry about how to somehow convey its color.
The most interesting, but at the same time difficult to perform, are shooting the moon at sunrise or sunset at dusk. Usually, these are the most picturesque paintings. Imagine a quiet summer evening, all the work in the garden has already been completed, you look up from the garden and suddenly you see a large full moon above the horizon, bright and yellow, like a polished copper coin.
If at heart you are more of a photographer than a gardener, then you immediately wash your hands of the greasy black soil, grab your camera and rush beyond the village to take this magical landscape against the backdrop of a forest, river or something else beautiful enough.
Indeed, if you know how to photograph such landscapes correctly, they turn out to be simply excellent.
 My brother famous photographer Artem Kashkanov shows
 how to photograph the moon
How to photograph lunar landscapes
When shooting at dusk, all novice photographers have the same problem. I'm not talking about the fact that some shoot such landscapes in auto mode with a flash :)
It's about the fact that the moon is on evening sky- a fairly bright object. If you set up your camera so that the evening landscape itself turns out well, then instead of such a bright and beautiful moon in the photo, you get just a white spot. If you shorten the shutter speed, then the moon itself will turn out very well, but the landscape will be very dark, barely visible.
Moreover, if the photographer sees a real landscape in front of him with a large and beautiful Moon, which you really want to photograph without stopping, then in the photo it usually turns out to be just a bright small dot.
What to do?
What is the best way to photograph the moon?
Alas, I would be the last scoundrel if I said that a beautiful lunar landscape can be obtained even using a camera mobile phone. At some stage in the development of technology, this will probably be possible, but now we need something more serious.
To photograph the moon, it is better to use a film camera with a telephoto lens. Why film? Everything is very simple. The dynamic range of film is noticeably wider than that of even professional digital cameras. in such a way to get beautiful photo Take out your old Zenith, stomp to the store for film (sensitivity no more than ISO 100) and get a telephoto lens somewhere. Naturally, all this had to be done in advance, and not rush around the evening city in search of an open photo shop where they sell film.
However, it is quite possible to shoot the Moon on a digital SLR if you know how.
Here are some pictures I took from the balcony of my own apartment. On the example of these photos, you can understand what parameters should be set when shooting lunar landscapes. Photos are given without any computer processing.
Photo 1. Time 7:59. ISO 320, shutter speed 1/50, aperture 5.6, focal length 400mm.

Despite the fact that the sky was already bright, I had to make it darker due to a shorter shutter speed. Otherwise, a bright spot would have turned out instead of the Moon.
Photo 2. Time 8:09. ISO 100, shutter speed 1/30, aperture 4.5, focal length 100mm.

I hope you remember the rule: the lower the sensitivity, the less noise the matrix, the better photo. In order to get the city, the shutter speed is increased. The result is obvious - the drawing on the moon is not readable.
Photo 3. Time 8:27. ISO 100, shutter speed 1/100, aperture 4.5, focal length 100mm.

As the sky gets lighter and lighter, it becomes possible to capture not only the image on the surface of the Moon, but also the landscape below it. If you slightly modify the "ground" in Photoshop, you get a quite tolerable picture.
Photo 4. Time 8:28. ISO 100, shutter speed 1/100, aperture 5.6, focal length 400mm.

This picture was taken almost immediately after the previous one. The only thing that has been changed from the settings is the focal length and, accordingly, the aperture. Note that as you get closer to the horizon, the outlines of the details on the surface of the Moon become more and more blurred, and the edges more jagged. This is due to the effect of "trembling" of the atmosphere.
Photo 5. Time 8:40. ISO 100, shutter speed 1/160, aperture 5.6, focal length 400mm.

The closer to the horizon, the bigger the moon appears. However, the less clear it is. We look at the Moon through a thick layer of air, which, unfortunately, is not as transparent as we would like. In this and the next photo, the sky and the earth are slightly "cropped".
Photo 6. Time 8:44. ISO 100, shutter speed 1/160, aperture 5.6, focal length 400mm.

And in conclusion, here is such a fantastic picture. If I had not seen the whole process, but accidentally cast my glance in that direction, I would have been quite surprised and would have wondered for a long time what kind of dome appeared on the horizon. After all, the details on the surface of the moon are now completely indistinguishable.
The closer the Moon is to the horizon, the faster its "fall" becomes. This is the moment when the photographer must be very attentive and capture the most interesting moments. For example, the passage of the Moon behind a pillar, etc.
The sun and the moon in the frame at the same time!
This photo was taken with an ordinary, not a professional digital SLR. Canon EOS 300D with the simplest whale lens. However, let's forget about the technical shortcomings of shooting for a second and be surprised: both the Sun and the Moon are present in the frame at the same time:

If I had noticed this situation earlier, when the sun had not yet completely set, the picture would have been even more interesting. Theoretically, there is nothing impossible for you to take such a photo. It is only necessary to properly calculate the date when such a combination will be possible, guess that the weather will be good and - forward.
How to photograph a lunar eclipse
If you become aware that a private event will soon take place, and even better, total eclipse of the moon, This great occasion spend the night in nature, breathe fresh air and, at the same time, take great pictures. Photographing the Moon during an eclipse also has a number of secrets and features.
Of course, you understand that you need to arm yourself with a telephoto lens and a tripod. Most importantly, do not miss the moment of the beginning of the eclipse. Unlike a solar eclipse, a lunar eclipse is a long process and, accordingly, it begins very smoothly.

Then it is worth filming all the phases of the eclipse, including the moment when only a narrow sickle remains from the Moon.
By the way, even during a total lunar eclipse, you can still see the dark part of the moon. It is visible due to sunlight passing through the earth's atmosphere and partially scattered by it. Your camera will see this especially well if you slightly lengthen the shutter speed:

Here it is worth paying attention again to the fact that the use of high-quality optics and a matrix can significantly affect the result. For example, take a look at this photo:

Then, in 2004, it seemed to me that this photo was quite clear and of high quality. However, I no longer think so.
As the brightest and largest object in the night sky, the Moon is an excellent subject to use as an introduction to astrophotography.
The moon is so large that it's easy to capture with a regular telephoto lens, and it's also bright enough to allow you to use a shutter speed fast enough to avoid having to use a tracking mount.
But even though the moon is relatively easy to photograph in the night sky, you still need to use the right techniques and careful planning to get a good shot.

Knowing how to photograph the moon starts with getting a long zoom lens so you get close enough to capture details. The 70-300mm telephoto lens is a great starting point, but if you really want to fill the frame with the moon, you may need a super telephoto lens.
Don't worry if you don't have a DSLR or mirrorless camera, as various bridge cameras also offer huge zoom lenses.
A tripod is also essential to avoid camera shake when shooting the moon. Also check the weather forecast ahead of time, as you will of course need clear and cloudless skies to photograph the Moon.
Rent a lens

Unlucky enough to have a hefty zoom lens in your collection? You can easily rent beautiful pieces of glass such as Calumet or Lenses For Hire.
Pollution in big cities can sometimes prevent a clear and crisp shot, so consider going somewhere where the air is cleaner to photograph the moon.
Look online for charts showing moonrise times, and if possible, wait until late at night as much as possible so that the sky is completely dark and the moon is bright and clear against a black background.
We hauled our gear out to the back yard half an hour before midnight to get everything ready for our shoot at the top of the page.
When you're ready to go, make sure your camera is set up so you'll be shooting in raw format. This will give you the image quality you need to be able to crop your final image to get closer to the moon, as well as edit exposure, contrast, and clarity to bring out detail on the moon's surface more clearly.
Besides being beautiful on its own, a large, bright moon shot can be useful. Once you've followed our steps and got a sharp image, we'll show you how to add your moonscape masterpiece to nightscapes in Photoshop.
While creating a well-lit nightscape that also includes a well-defined moon is a challenge, it's very easy to add a moon in Photoshop, and we'll show you how to create a dramatic composition in five easy steps.
Step by Step: How to Photograph the Moon
Image 1 of 4

Image Credit: Moon Connection
1. Find out the phase and choose the right date
Start by figuring out when and where the moon will be visible in the night sky, as well as how much of it will be illuminated by the sun (a region known as a phase). On many meteorological websites such as Moon Connection, you can easily find a lot of information about the times and positions of the moon's rise and descent, as well as its phases, or use an application such as Photographer's Ephemeris. A perfectly full moon, like the one we're shooting, has the most visual impact.
Image 2 of 4

Image Credit: Digital Camera World
2. Zoom in
Once you have decided on the right time for shooting the moon, the technique is quite simple. You will need a 300mm or larger lens to get a reasonable size in the frame. A tripod will keep your camera steady, and a remote shutter release will further reduce shake - if you don't have one, set your camera's self-timer to a few seconds in the setup menu.
Image 3 of 4

Image Credit: Digital Camera World
3. Tune in
Switch the camera to manual mode, and the lens is in manual focus. Your exact exposure will vary depending on conditions, but in manual exposure mode, start at ISO800, a shutter speed of 1/250 sec, and an aperture of f/5.6. Adjust the ISO or aperture to clearly see details on the surface. Avoid using a slower shutter speed when adjusting settings. This will blur the moon. These hidden dangers are easy to forget.
Image 4 of 4

Image Credit: Digital Camera World
4. Focus
The moon won't fill the frame, so judging focus can be a problem. The best way focus - use live mode View, then zoom in and carefully manually focus on the Moon's surface.
Make the moon bigger

Image Credit: Thomas Kinto on Unsplash
When deciding when to shoot the Moon, it's also worth remembering that it's not always the same distance from Earth. Its orbit is elliptical, so this distance varies with different time. When a full moon is closer than 220,000 miles (360,000 km) from Earth, it is called a super moon. The difference in size and brightness between a supermoon and a micromoon is small, but even a small change can change your shots. For detailed information about the Moon, try the Moonrise and Moonset calculator.
Missed the full moon?
You can still get a decent lunar picture - the crescents make for beautiful shots, and the three-quarter moon shows good crater detail.
You will need to enter your location, which will allow you to find all sorts of useful information such as moonrise and moonset times. On this site, you can also learn about a much rarer event - a lunar eclipse. This can be a stunning sight because during a total lunar eclipse, the moon can transform into a glowing red. During this event, the moon is much less bright than when it is lit by the sun, so you need to use a higher ISO or a wider aperture. But the results can be stunning.
Beware of condensation

Image Credit: Kym on Unsplash
As temperatures drop at night, you often find that any moisture in the air will condense on any of your outdoor gear.
On a tripod, in a bag, or even off camera, this can be frustrating, but not fatal. When it forms on the lens, viewfinder and rear screen, it becomes a real problem.
You can minimize the chance of condensation forming by giving your device some time to gradually acclimatize rather than taking it straight out of a warm car or home into cold air, but on many evenings you will still find that condensation forms, so take plenty of clothes and cleaning kit.
David Noton, renowned landscape photographer and Canon Ambassador shares how to capture the longest lunar eclipse of this century.
On Friday, July 27, 2018, the longest lunar eclipse of this century awaits us, during which the Moon will turn blood red. This astronomical event will last for a total of 1 hour 43 minutes, starting from sunset and moonrise over Europe.
A lunar eclipse is a phenomenon when the Earth blocks sunlight and the moon is in its shadow. The moon will turn red due to an effect known as Rayleigh scattering (also called elastic scattering), where green and violet waves are sort of filtered out in the atmosphere.
It will be possible to see the "bloody" Moon from different parts of the continent, but in southeastern Europe the phenomenon will be longer, since there the satellite will be higher in the sky during the eclipse.
Canon Ambassador and acclaimed landscape photographer David Noughton shares five tips to help you capture this rare and unusual phenomenon.
Download dedicated apps
The position of the sun in the sky certain time days depends only on the latitude of the observation point and the time of year. However, with the Moon, things are somewhat different - its apparent movement across the sky is determined by the complex elliptical orbit of the Earth. Changes in the trajectory of the Moon's motion do not depend on the annual, but on the monthly cycle, which is why the time of the appearance of the Moon and its trajectory change so much.
Fortunately, you no longer need to fiddle with astronomical tables to calculate the movement of the moon - just download the application on your smartphone. For example, the Photographer's Ephemeris app will tell you the time of moonrise and set, its azimuths and phases; and the Photopills application provides detailed information about the position of the moon in the sky.
With the help of these two applications, I plan to shoot the "blood" moon in Dorset, England. I want to capture it in the first 15 minutes after sunrise, while it is still low in the sky - then I can capture some object on the horizon, such as a tree on a hill, to reflect the scale of a celestial body.
Use a telephoto lens
One of the main tasks that I will have to solve on July 27 is how to photograph the Moon so large that every crater on the surface riddled with asteroids is visible. Usually such problems are solved by astronomers with super-powerful telescopes. However, a telephoto lens with a focal length of about 600mm on a full-frame camera also makes for an impressive shot. I will be shooting with a Canon EOS 5D Mark IV with an EF 200-400mm f/4L IS USM Ext. 1.4x.
Use a tripod
When choosing a frame, you will find that the Moon moves across the sky at an unexpected speed and it is surprisingly difficult to follow it through the lens. Since you will be using a long focal length lens, it is important to choose a stable tripod from which you can get the best possible shots. If you want to shoot handheld, keep in mind that the subject is located more than 384,000 kilometers away from you, and even with a fast shutter speed, the slightest movement will ruin the frame.
Fit the moon into the landscape

Don't forget composition. Although detailed images of the moon close-up may be beautiful, in fact they have only astronomical value. The Moon attracts me much more when it is part of the landscape or serves as a light source when shooting. It is quite difficult to achieve the latter, since the amount of light reflected by the Moon is small and, compared with it, the lunar surface itself turns out to be very bright. Until recently, night photography inevitably required a lot of long exposure, however, the amazing light sensitivity of cameras such as the EOS-1D X Mark II and Canon EOS 5D Mark IV opened up a whole new world for photographers. new world night shooting.
Choose a shutter speed that suits your subject
The Moon looks most expressive and natural in a landscape when it is surrounded by a slightly illuminated sky. Such pictures are realistic, they are full of charm and special mood.

In any shot taken at medium or wide angles, the moon will appear as a spot of light the size of a pinhead, but its presence will still be felt. She naturally attracts the eye, even if it seems to be an insignificant detail. Of course, you will need to find the right shutter speed: if it is too fast, then even when shooting with a wide-angle lens, only an ugly blurry trace will remain in the picture.

On a clear night, a good choice of shutter speed - necessary condition to photograph the moon. A shutter speed of 1/250 s at f8 and ISO 100 (depending on the focal length) will help you avoid blurring and get a technically flawless shot. With a high-end camera like the Canon EOS 5DS R, you might even be able to see the twelve cameras that were left on the Moon by NASA astronauts in the 1960s!
About David Noughton
The author of many breathtaking landscapes and views from different parts of the world, multiple winner of the title of BBC Photographer of the Year - wild nature", David has been at the forefront of his field for more than thirty years. At age 60, he is still traveling and shooting landscapes. From Canon, he prefers the EOS 5DS R and EOS 5D Mark IV and the EF 24-70mm f/2.8L II USM.
Thanks for the material
I saw a discussion of a photograph in which the silhouette of a cyclist was shot against the backdrop of a large moon. Many commentators considered it to be a montage (it is incorrect to assume that "montage" and "Photoshop" are synonyms). I'll tell you how to take such a picture and why this effect is obtained.
Everything is simple. For shooting a large moon, long-focus optics were used. The original post described that a 2x teleconverter was screwed to the 800mm lens, resulting in a 1600mm focal length. What does it give? Let's explain to simple circuits.
A wide-angle lens differs from a long-focus lens in its field of view. So the new Canon EF 24-70 2.8L II has an angle of view at 24 millimeters of focal length (with a camera like Canon 5D Mark III) is 84, and at 70 millimeters - 34.3 degrees (59.1 and 22 degrees on cropped cameras like Canon 100D-70D, respectively). That is, your camera looks at the world like this:

By changing the focal length, you change the angular dimensions of objects in the frame in the picture.
Let's say we need to take a picture of a ball with a cube. The distance between the ball itself and the cube does not change with us - they are standing in a clearing. In order for the ball to take up most of the frame with a wide-angle lens, we will approach it as close as possible. What happens with the cube? It in the picture (on the right) turns out to be much smaller than the ball:

If we put a long-focus lens on the camera, then we will have to move away - the ball will not fit into the frame at close range, because the viewing angle of the "telephoto" is much smaller:

To be precise, the 800mm Canon EF 800mm f/5.6L IS USM that shot the cyclist has 3.1 degrees (!) on a camera like the Canon 5D Mark III.
And once you move further away, the angular dimensions of the objects in the frame... will also change! The object that was further away will look larger in the picture, and the further you move away, the larger the cube will appear relative to the ball. An interesting effect is even possible here: if the cube is initially larger than the ball, then when shooting with a wide-angle lens, it will seem much smaller than the ball, and when shooting with a long-focus lens, it will be larger and will protrude beyond its edges!
Now about practice. To shoot a large moon, you need a long lens, with which you need to move away from the subject that you wanted to photograph against the background of the satellite, as far as possible. On a SLR, you can take an inexpensive 70-300. And if you screw a two-fold inexpensive teleconverter to the 70-300, take a camera with a cropped sensor, then you will get 300x2x1.6=960 millimeters of focal length. Get a good distance away, mount your camera on a tripod, aim at the subject and the moon, set up and . And of course, don't forget to select the object you need in the frame "for scale" - it can be a building, a car or something else.
It is worth considering one more thing - the moon is usually visible at night, which means we have little light. It would seem that in this case it is necessary to do? Increase the shutter speed so as not to bully the ISO, especially the 70-300 lenses, and even with a teleconverter, are very dark. But this is wrong - the moon moves across the sky and it is impossible to photograph it with a shutter speed of several minutes, because it will be smeared, just like cars and moving people are smeared. With a focal length of about 1000-1500 millimeters, the shutter speed should not be longer than 0.5 seconds; when photographing at 300 millimeters, you can increase the shutter speed to two or three seconds, but no more. This means that in order to ensure such a shutter speed with the available aperture, you will have to raise the ISO. How much? Look at the situation, digital cameras allow you to deal with it quickly.
There is a third nuance. The moon reflects the light of the sun very strongly. Getting a properly exposed moon and a beautiful sky with clouds or stars at the same time is not easy. Here you can already resort to collage - shoot the moon with one shutter speed, and clouds and stars with other settings, and then add everything in Photoshop. Yet, as I have said many times, .
The last nuance: the moon low above the horizon seems to be several times larger than when it is high in the sky, and it is advantageous to shoot it at such a moment. This phenomenon is well described in Wiki. However, there is almost nothing about atmospheric lenses, and the moon does not seem very large every day.
It's somewhere like this. I tried to explain as simply as possible, I hope it worked out. By the way, my wonderful friend and hardened specialist in photography spoke well about the effect of focal length on perspective podakuni in our series of articles "How to take pictures with a mirrorless camera" on THG.ru. For those who have not read, I recommend - there is a lot of educational program and theoretical foundations, which can be applied when shooting with any camera.
Summarizing. This is definitely a montage:

Judging by the perspective, to get such a shot of a girl, you would have to use a wide-angle lens and shoot close. The moon in such a photograph would have to look like this:

And here is an example of shooting the sun at sunset. I photographed this on the way to Rybinsk:

EXIF on the picture is saved, you can see the shooting parameters yourself. The size of the sun in Photoshop did not change.
Of course, some kind of processing is often used in such pictures - the same increase in contrast, for example, to make the picture more dramatic, playing with white balance. But do not confuse processing, retouching and collage - any of these concepts fit into "photoshop", but these are fundamentally different things.