Preparing your hand for writing: a system of exercises to prepare the hand for writing, tasks for the development of manual skills for older children preschool age, the readiness of the child's hand to write.

Preparing your hand for writing
Letter- this is a difficult skill for a child that requires finely coordinated movements, well-coordinated work of the small muscles of the hand, the ability to concentrate, and the ability to control one's activities. Learning to write is a time-consuming process that usually takes place in the first months of children's stay at school. However, both in the preschool years in the family and in kindergarten, a lot can be done to prepare the baby for this process and make it easier for the future first-grader to master writing.
It is important to prepare the hand for writing in the preschool years, and not to teach the child to write. These are two completely different tasks!

Preparing a hand for writing at preschool age includes several areas:
— development of hand skills(creating crafts, designing, drawing, modeling, in which fine motor skills, eye, accuracy, the ability to complete the work begun, attention, spatial orientation develop),
— development in children of a sense of rhythm, the ability to coordinate the word and movement in a certain rhythm,
— development of graphic skills(this happens in the process of drawing and graphic work - drawing by cells, coloring, shading and other types of tasks),
— development of spatial orientation(the ability to navigate on a sheet of paper: on the right, on the left, in the upper right corner, in the middle, in the top line, in the bottom line) - read more about the system of entertaining games for the development of spatial orientation in the article "Orientation in space".

Preparing your hand for writing: a system of exercises for fingers
Below I give one of the sets of exercises for preparing the hand for writing, developed by T.V. Fadeeva. The names of the exercises were invented by me in joint work with children. You can come up with your own names.
First exercise. "Put your fingers up." Hands are on the table with palms down. You need to raise your fingers one at a time, first on one hand, then on the other. Then the exercise is repeated in reverse order.
Second exercise. "Get on the charger!" The hands are in the same position. You need to take turns raising your fingers on both hands at once. We start with the little fingers, end with the thumbs.
Third exercise. "Vanka - stand up." The child pinches the pencil with the middle and index fingers. Then the fingers begin to "do exercises", that is, go down and up with the pencil. When moving, you need to keep your fingers together and not drop the pencil.
Fourth exercise. "Put the sticks in the basket." Place 10-15 counting sticks on the table. If they are not there, you can replace them with pencils or other objects of the same shape (cocktail sticks, and so on). The task is to collect all the sticks one by one into a fist with one hand, without helping with the second hand. Then put them on the table one by one.
Fifth exercise. "Steps". Let's walk on the table with our fingers. We clamp the pencil between the index and middle fingers (the pencil adheres to the second phalanx of the fingers). And in this position we take steps with our fingers on the table. You need to walk holding the pencil tightly so as not to drop it. The steps are very small.
Sixth exercise. "Pinwheel". We take a pencil again. Hold it by the tip with one hand. We clamp one end of the pencil with the index and middle fingers of the leading hand (right - for right-handers, left - for left-handers). The other end of the pencil is directed away from the chest.
Task - you need to turn the pencil over and with the help of this flip put it in the other hand with the free end. Then a new turn - and again the pencil returns to the leading hand. Make several such turns - as if the wheel is rolling. When rotated, the pencil "looks" in the direction from the chest forward.
Seventh exercise. "Ball". We roll the ball. Imagine that we have a ball in our palms. And we make movements with our palms, as if we are rolling it in different directions.
Eighth exercise. "Hugs". This exercise allows you to prevent the occurrence of writing spasm. Writing spasm is manifested in children who are just learning to write, it is not uncommon in first-graders. With writing spasm, the fingers begin to hurt a little and become numb, sometimes they tremble a little (this is barely noticeable, but you can notice it). You can't ignore the spasm. It is necessary to remove it if it has already arisen, and even better - to warn it with this exercise.
Sit on a chair, hands at eye level. We connect the palms with each other. We inhale through the nose. We exhale through the mouth and at the same time slightly shift the right palm down - a few centimeters. At the same time, the fingers of the left hand are bent and cover the fingers of the right hand ("hug" them, superimposed on them from above). Again we take a breath through the nose, unbend the fingers of the left hand and return the right palm to its place. We do the exercise in the other direction - now left hand lowers, and the fingers of the right hand “hug” the fingers of the left hand from above. You need to perform the exercise 10-15 times.

Preparing the hand for writing: determining the leading hand in a child
Before doing graphic exercises with a child, you need to identify his leading hand. Sometimes this is easy, because it is already clear that the child is right-handed. Or that he is clearly left-handed. And sometimes the child does all the tasks with one or the other hand. Why? What is his dominant hand? How and when to determine the leading hand in preschool children, you will learn from the article

Preparing the Hand for Writing: Developing Manual Skill
The development of manual skill has always been one of the important tasks of educating preschool children. Interesting « handmade"for children, the author of the world's first system of educational games for kids came up with in the 19th century (folding from paper - an analogy of modern origami, designing from peas and sticks, laying out figures from sticks and torches, stringing, weaving patterns from strips of paper, finger games). Exercises for the development of "manual skill" were also included in the system of tasks for children, developed (inserts, frames for fastening and lacing, and others), in the system (working with clay, sand, wood, paper and cardboard).
TOP 30 activities that contribute to the development of manual skills and prepare the child's hand for writing:
This is important to know: A simple pencil is used to prepare for writing and perform graphic exercises with preschool children. You can not use felt-tip pens in these exercises, since they do not require muscle effort from the baby to draw a line.
- laying out figures and patterns from small mosaics,
- construction from small parts, from constructors requiring tightening nuts, screws,
- construction from paper and cardboard,
- weaving cords from bright colored ropes,
- work on a children's desktop loom,
- crocheting and knitting (the works of E. Shuleshko convincingly proved how effective knitting is in preparing children for school),
- sewing and embroidery (Note: for a child of 6 years old, a needle 4 cm long is needed, not thin, with a longitudinal eye. Children master the seams “forward needle” in a straight line, “by the needle”, “over the edge”),
- making crafts from wire,
- sewing on buttons
– stringing beads and making children's beads,
- visual activity (sculpting, application, drawing),
- finger games
- hatching,
– making collages (cutting figures from magazines with scissors and composing compositions from them),
- Woodburning,
- sawing,
- felting,
- coloring pictures (it is important not to color in itself, but to color the picture with a pencil without going beyond the contours, carefully, slowly),
- drawing patterns on paper in a box (“continue the started pattern”),
- drawing the missing half of the picture in the cells,
- tracing drawings by dots,
- laying out figures and patterns from matches (for matches, you must first cut off the heads for the safety of the child).
- weaving different patterns from paper strips, and then from braid, inventing new combinations and patterns (see "Gifts of Fröbel" - weaving from stripes),
- making paper beads (A rectangular strip is cut diagonally into triangles. Each triangle is twisted diagonally, the end of the triangle is glued. It turns out a colored paper bead. The beads are strung on a braid).
- cutting out garlands from paper folded like an accordion,
- decorative drawing (drawing patterns - elements of Russian paintings - Khokhloma, Gorodets, Mezen and others) - the child learns to correctly arrange the elements on the plane, build them in rhythm,
- tasks with rulers - stencils of animals, geometric shapes, fruits, vegetables and other figures (tracing a contour on a stencil and shading it or drawing and coloring it; drawing up pictures from elements of different stencils),
- drawing on the board with chalk, colored crayons,
- origami,
- making crafts from natural materials (cones, chestnuts, twigs, leaves, seeds, peas).

Preparing a hand for writing: how to determine the level of readiness of a child's hand for writing?
At home, you can do some simple exercises with your child that will help determine whether the baby’s fine motor skills are well developed and whether his hand is ready for writing. Here are two traditional assignments (often given to children when they enter school) as an example.
Task 1. Draw a circle. Show the child a circle drawn on a piece of paper. The diameter of the circle is 3-3.5 cm. And ask the child to draw exactly the same circle on his sheet of paper (with a simple pencil).
If the child's hand is poorly developed, then the following signs may be observed:
- instead of a circle, an oval will turn out or the circle will come out too small,
- the line will be intermittent, angular, uneven; instead of one smooth movement of the hand when drawing a circle, the child will have many small intermittent movements of the hand when drawing,
- the child will strive to fix the hand motionless on a sheet of paper.
Task 2. Shrikhovka. Invite the child to shade the silhouette simple object(house, boat, apple or any other) in straight lines, without going beyond the boundaries of the silhouette. Show a sample - how to hatch (horizontal hatching, vertical hatching, diagonal hatching) The child himself chooses in which direction he will hatch.
If the hand is not well developed , then the baby will constantly turn the image over (because he cannot change the direction of action with his hand).
Preparing your hand for writing: learning how to hold a pen and pencil correctly
How to hold a pencil correctly and incorrectly when writing and doing graphic work: you need to know this!

Signs of improper use of a pencil or pen by a preschooler:
First. The child does not hold a pencil and a pen correctly - he holds a “pinch” (collects his fingers in a handful together) or even in a fist.
Second. Incorrect finger position when holding a pen or pencil. It manifests itself in the fact that the pencil lies not on the middle finger, but on the index finger.
Third. The child is holding a pencil or pen too close to the lead, or too far away from it.
To fix these mistakes , do with your child a game finger exercise “Building a house with letters”, which will help you learn how to properly hold a pen in your hand:
Take a pencil or pen correctly (hold the pencil between your thumb and middle fingers, while stepping back from the bottom edge - the pencil lead - up a few centimeters), put your index finger on top of the pencil. The index finger can move freely up and down, and the pencil will not fall, as it is firmly held by the thumb and middle fingers. Show your child how to do this - “tap” the pencil with your index finger.
And say a poem rhythmically with the child, raising and lowering the index finger to the rhythm of the verses (knocking with the index finger: “knock-knock”):
Knock knock, with a hammer,
We'll build a house.
Knock knock, with a hammer,
Settle, letters, in it.
This exercise allows the child to understand how to properly hold a pen and pencil in his hand.
Another one typical mistake
child.
The fourth mistake is the wrong position of the hand when writing or performing graphic tasks.
How to hold a pencil or pen
- the top edge of the pencil or pen should be directed towards the shoulder of the writer.
How to hold a pencil or pen incorrectly
- the brush is turned out, the upper end of the pencil or pen "looks" to the side or away from itself. The hand and elbow hang over the table.
Show the child where the pen should “look” - towards his shoulder of the writing hand.
Exercises to prepare the hand for writing and develop fine motor skills.
You will find exercises to prepare your hand for writing and develop fine motor skills and sensorimotor coordination in this video. What exercises can be done with chestnuts, orthopedic balls, ropes - hedgehogs, spinning tops? How do they prepare the hand so that later the hand holds the pencil and pen correctly? A few ideas for activities with a child at home and in kindergarten.
I hope these recommendations preparing the hand for writing will help you. And what tasks that prepare your hand for writing do you use? And which of them are especially loved by you and your children? Let's share our experience in the comments.
Until we meet again on the "Native Path"!
You can find more interesting information, games and exercises on the development of fine motor skills and preparing your hand for writing in the articles of the site:
And at the end of the article some ideas for preparing your hand for writing in a very joyful video for a good mood for you and your children! You will see in it modern manuals that are used in kindergartens to prepare children's hands for writing, develop fine motor skills and hand-eye coordination. And - I was very pleased - it also contains textile toys of my favorite "Naive World" (everyone who was at the Internet Workshop of educational games, which I host every spring, remembers these toys. , the constant and very sincere sponsor of the "Native Path" and the Workshop of Games "Through the game - to success!")
I wish you and your kids success!
Get NEW FREE AUDIO COURSE WITH GAME APP
"Speech development from 0 to 7 years: what is important to know and what to do. Cheat sheet for parents"
Click on or on the course cover below for free subscription
Preparing a child's hand for writing
Letter
- this is a difficult skill for a child that requires finely coordinated movements, well-coordinated work of the small muscles of the hand, the ability to concentrate, and the ability to control one's activities. Learning to write is a time-consuming process that usually takes place in the first months of children's stay at school. However, both in the preschool years in the family and in kindergarten, a lot can be done to prepare the baby for this process and make it easier for the future first-grader to master writing.
It is important to prepare the hand for writing in the preschool years, and not to teach the child to write.
These are two completely different tasks!
Preparing the Hand for Writing: Finger Exercises
"Get on the charger!" The hands are in the same position. You need to take turns raising your fingers on both hands at once. We start with the little fingers, end with the thumbs.
Third exercise. "Vanka - stand up." The child pinches the pencil with the middle and index fingers. Then the fingers begin to "do exercises", that is, go down and up with the pencil. When moving, you need to keep your fingers together and not drop the pencil.
Fourth exercise. "Put the sticks in the basket." Place 10-15 counting sticks on the table. If they are not there, you can replace them with pencils or other objects of the same shape (cocktail sticks, and so on). The task is to collect all the sticks one by one into a fist with one hand, without helping with the second hand. Then put them on the table one by one.
Fifth exercise. "Steps". Let's walk on the table with our fingers. We clamp the pencil between the index and middle fingers (the pencil adheres to the second phalanx of the fingers). And in this position we take steps with our fingers on the table. You need to walk holding the pencil tightly so as not to drop it. The steps are very small.

Sixth exercise. "Pinwheel". We take a pencil again. Hold it by the tip with one hand. We clamp one end of the pencil with the index and middle fingers of the leading hand (right - for right-handers, left - for left-handers). The other end of the pencil is directed away from the chest.
"Ball". We roll the ball. Imagine that we have a ball in our palms. And we make movements with our palms, as if we are rolling it in different directions.
"Hugs". This exercise allows you to prevent the occurrence of writing spasm. Writing spasm is manifested in children who are just learning to write, it is not uncommon in first-graders. With writing spasm, the fingers begin to hurt a little and become numb, sometimes they tremble a little (this is barely noticeable, but you can notice it). You can't ignore the spasm. It is necessary to remove it if it has already arisen, and even better - to warn it with this exercise.
A simple pencil is used to prepare for writing and perform graphic exercises with preschool children. You can not use felt-tip pens in these exercises, since they do not require muscle effort from the baby to draw a line.
Laying out figures and patterns from small mosaics,

- construction from small parts, from constructors requiring screwing nuts, screws,
- construction from paper and cardboard,
- weaving cords from bright colored ropes,
- work on a children's desktop loom,
- sewing on buttons
- stringing beads and making children's beads,
- visual activity (sculpting, application, drawing),
- finger games
- hatching,
- making collages (cutting figures from magazines with scissors and composing compositions from them),
- Woodburning,
- sawing,
- felting,
- coloring pictures (it is important not to color in itself, but to color the picture with a pencil without going beyond the contours, carefully, slowly),
- drawing patterns on paper in a box (“continue the started pattern”),
- finishing the missing half of the picture in the cells,
- tracing drawings by dots,
- laying out figures and patterns from matches (for matches, you must first cut off the heads for the safety of the child).
- tasks with rulers - stencils of animals, geometric shapes, fruits, vegetables and other figures (tracing a contour on a stencil and shading it or drawing and coloring it; drawing up pictures from elements of different stencils),
- drawing on the board with chalk, colored crayons,
- origami,
- making crafts from natural materials (cones, chestnuts, twigs, leaves, seeds, peas).
Preparing a hand for writing: how to determine the level of readiness of a child's hand for writing?
At home, you can do some simple exercises with your child that will help determine whether the baby’s fine motor skills are well developed and whether his hand is ready for writing.
Task 1. Draw a circle. Show the child a circle drawn on a piece of paper. The diameter of the circle is 3-3.5 cm. And ask the child to draw exactly the same circle on his sheet of paper (with a simple pencil).
If the child's hand is poorly developed, then the following signs may be observed:
- instead of a circle, an oval will turn out or the circle will come out too small,
- the line will be intermittent, angular, uneven; instead of one smooth movement of the hand when drawing a circle, the child will have many small intermittent movements of the hand when drawing,
- the child will strive to fix the hand motionless on a sheet of paper.
Task 2. Shrikhovka. Invite the child to shade the silhouette of a simple object (house, boat, apple, or any other) with straight lines, without going beyond the boundaries of the silhouette. Show a sample - how to hatch (horizontal hatching, vertical hatching, diagonal hatching) The child himself chooses in which direction he will hatch.
If the hand is not well developed , then the baby will constantly turn the image over (because he cannot change the direction of action with his hand).
Preparing your hand for writing: learning how to hold a pen and pencil correctly

How to hold a pencil correctly and incorrectly when writing and doing graphic work: you need to know this!
Signs of improper use of a pencil or pen by a preschooler:
First. The child does not hold a pencil and a pen correctly - he holds a “pinch” (collects his fingers in a handful together) or even in a fist.
Incorrect finger position when holding a pen or pencil. It manifests itself in the fact that the pencil lies not on the middle finger, but on the index finger.
The child is holding a pencil or pen too close to the lead, or too far away from it.
To fix these mistakes , do with your child a game finger exercise “Building a house with letters”, which will help you learn how to properly hold a pen in your hand:
Take a pencil or pen correctly (hold the pencil between your thumb and middle fingers, while stepping back from the bottom edge - the pencil lead - up a few centimeters), put your index finger on top of the pencil. The index finger can move freely up and down, and the pencil will not fall, as it is firmly held by the thumb and middle fingers. Show your child how to do this - “tap” the pencil with your index finger.
And say a poem rhythmically with the child, raising and lowering the index finger to the rhythm of the verses (knocking with the index finger: “knock-knock”):
Knock knock, with a hammer,
We'll build a house.
Knock knock, with a hammer,
Settle, letters, in it.
This exercise allows the child to understand how to properly hold a pen and pencil in his hand.
Another onetypical mistake
child.
The fourth mistake is the wrong position of the hand when writing or performing graphic tasks.
How to hold a pencil or pen
- the top edge of the pencil or pen should be directed towards the shoulder of the writer.
How to hold a pencil or pen incorrectly
- the brush is turned out, the upper end of the pencil or pen "looks" to the side or away from itself. The hand and elbow hang over the table.
Show the child where the pen should “look” - towards his shoulder of the writing hand.
Preparing a hand for writing is an obligatory stage in teaching a child. Many inexperienced parents don't know where to start preparatory stage. In this regard, training often ends in a quarrel with the child. As a result, there is a reluctance to learn. In the future, such children feel educational institution uncertain. Most often they have poor academic performance and sloppy handwriting. Our article contains information that will allow parents to understand how to properly prepare a child for writing.
Special toys
Writing is a difficult skill for children to learn. Not every child can master it right away. Preparing your hand for writing is one of the most complex processes, which must be passed before systematic training. Writing letters requires the coordinated work of the hand and the whole body. In children younger age fine motor skills are developed at an insufficient level. The muscles of the hands during this period are still weak. It is important to prepare a young child for writing, not to teach it. It is necessary to create conditions that will allow children to gain practical experience.
How should you prepare your hand for writing? 3 years is the best age to start the first stage of training. To date, there are many toys, thanks to which you can easily prepare a child for writing letters. At the age of three, children are still poorly oriented in space, and work with writing is not suitable for them. That is why toys allow you to learn new skills in a fun and interesting way.
One of the toys that help prepare a child for writing is the top. Everyone is familiar with her, but here is her positive traits not known to everyone. Thanks to this toy, you can master several capture techniques. The movements of the hands up and down strengthen them. When introducing a child to a spinning top, it is necessary to teach him to spin the toy with his whole hand. It will need to be strained and held in one position. Over time, the child must be taught to spin the toy with three fingers. Training with a top is always effective, as children are fascinated by the process of its movement. Another plus of such a toy is its low cost.
Everyone also knows the top toy. It is also low cost and efficient. She is quite similar to Yula. However, to rotate it, it is necessary to perform a sharp circular motion with the hand, holding the handle with three fingers. Top happens different sizes. The smallest models can be found in chocolate surprise eggs. Preparing your hand for writing with such a toy is more effective. However, in order to unwind it, you need a certain skill and dexterity. For greater efficiency, the child can compete with parents or peers. In this case, such unusual learning will be more attractive for children.
Musical instruments also play an important role in learning. For example, the drum trains the flexor and extensor muscles of the hands. In order to improve the mobility of children's fingers, it is necessary to give preference to keyboards and stringed musical instruments. These include balalaika, guitar, piano and the like.
Mosaic attracts many children. Due to the small size of the parts, such a toy forms a small one. It is important to use only two fingers to collect patterns and drawings.
Finger gymnastics
Preparing a preschooler's hand for writing is an important stage of learning that requires certain skills. Finger gymnastics can be carried out from the first days of life. It is important to exercise daily.
First you need to massage all the fingers. If the child cannot complete the exercise on his own, parents should help him. You need to start with your fingertips. You will need to make stroking, circular and rubbing movements. The duration of this massage is 2-3 minutes. It must be carried out before and after working with a pen or pencil. This massage can be performed on children of any age. Thanks to him, the mobility of the fingers improves.
During work, the child must make several wave movements with the hands. Thanks to this, children can relax and continue learning to write with renewed vigor. After finishing work, you need to shake your fingers.
Features of the formation of letters in children
Writing is a rather difficult skill to learn for children 3-7 years old. By the first grade, according to physiology, a child's nervous system and neuromuscular apparatus are formed. According to these criteria, a six-year-old child is not inferior to an adult. After 5-6 years, according to research, children develop conditioned reflex functions of reading and writing. During preschool age, the role of the word in the formation of motor skills increases.
Preparation of the hand for writing is divided into several stages. Preschool age is considered an indicative stage. In the process, her child gets acquainted with graphic movements, and also acquires a graphic skill. From proper organization this stage the success of the first written exercises in a general education institution directly depends. It is known that children from the first years of life are interested in paper and pen. IN preschool institutions regular classes in fine arts. On them, children learn the graphic skills that they will need in the future.
There are 3 types of writing skills:
- technical - the ability to use stationery for its intended purpose;
- graphic - the ability to correctly depict letters, numbers and sounds;
- spelling - the ability to hear and write the word correctly.
At the initial stages of learning, the child controls his movements with his eyesight. He looks at the letter written on the blackboard and mentally analyzes its structure. Over time, a model of an alphabetic sign is created in the head and outside help is not needed.
Experts say that even before school, a child must acquire a sensory experience of orientation in space. He must be able to correct his movements. That is why the handwriting preparation program must be completed in advance. Thanks to her, the child gets rid of those difficulties that arise in the early stages. Children can easily master writing with basic knowledge. It is these children who most often have calligraphic handwriting.

Drop therapy is a great way to prepare
It is quite simple to prepare the hand for writing. 4-5 years, according to many parents, is the best age to get basic knowledge and skills. Drop therapy is a method by which a child can not only prepare his hand for writing, but also develop a versatile and creative personality.
Drop therapy is drawing with multi-colored drops. To use this training technique, you must prepare in advance:
- watercolor paints;
- paper;
- napkins;
- sponge
- apron;
- pipette.
In each glass it is necessary to dilute a certain color. It is desirable that the palette of colors be varied and bright. The technique is quite simple for a child. He needs to draw the desired color into the pipette and draw a picture on paper with the help of drops.
Children love working with different colors. Thanks to this, the lesson turns out to be interesting and bright. You need to draw carefully, and apply a drop accurately. The session is effective as the child's movements become more coordinated.
Thanks to drop therapy, fine motor skills develop in children. Over time, the child will be able to hold correctly. He can easily complete the task of the teacher and write this or that letter. In addition, drop therapy develops children's creative imagination. It is known that due to the work with this technique, there is a positive trend in the readiness of future students to study in a general education institution. Drop therapy has a positive effect on self-esteem, attentiveness and coordination. Children learn to see something beautiful in every drop.
Decorative drawing in preparation for writing
Many find it difficult to prepare their hands for writing. 4-5-year-olds cannot concentrate on a particular learning activity. The preparation of children often does not suit elementary school teachers either. They claim that many children find it difficult to learn how to write. This is due to the fact that they do not have the initial knowledge that must be obtained at preschool age in order to acquire the skill of writing.

When choosing a preschool institution, it is important to find out if there is a preparation of the hand for writing in the older group. However, do not forget that parents play an important role in education. They should also have regular sessions with their child. It is important that in no case do they scold the child for mistakes. Parents and caregivers should not take responsibility school teacher and teach the child to write letters. Their duties include only the complete preparation of the hand for writing. It is important for children that such activities are fun and easy.
Decorative drawing is considered an effective technique that allows you to prepare a child. It helps in the development of motor sensations and fine motor skills of the hands. Drawing patterns, children learn to draw a line. Drawing dots, strokes and small elements teaches you to limit your movements. This is essential for writing words, numbers and signs. Some elements resemble fragments of letters, namely the oval, hooks, sticks, etc.
Decorative drawing allows you to solve many other educational problems. It has a positive effect on mental activity. It allows you to bring joy and other joy into the world of the child. positive emotions. Thanks to decorative drawing, children see the result of their activities. They learn to analyze them, and also find a use for them. Such preparation of the hand for writing at school allows you to educate a multifaceted personality in a child.
Preparing for Montessori Writing
The Montessori method of teaching children has been popular among parents for several years now. This technique allows you to teach your child a wide variety of skills. The Montessori method is often found in general education and preschool institutions. To date, there are also institutions in which teachers work with children only using this technique. In such institutions, there is a high academic performance.
Parents often do not understand how the hand should be prepared for writing. 5 years is the age when children most often begin to be taught and prepared for school. However, preparation for writing should begin much earlier. Late start learning never ends with success.
Thanks to the child, you can prepare for writing much earlier than he is interested in pen and paper. To do this, there are many exercises that can be easily performed at home. From an early age, a child can train fine motor skills by stringing beads on a string and cutting paper. According to the Montessori method, washing hands, cleaning shoes and the table is also a kind of preparation of the hand for mastering writing skills. This is no coincidence, because all movements are performed with the right hand. in a circular motion from left to right. She absolutely also moves when writing letters.
Preparing the hand of preschool children for writing according to the Montessori method begins with the main exercise. It is connected to the frame inserts. In it, the child needs to circle a special frame, and then shade the resulting figure. Thanks to this exercise, children learn to hold the writing instruments correctly and perform the same movements as when filling out the prescription. At the same time, the child does not feel discomfort and performs the task with interest.
The rough alphabet according to the Montessori method is quite effective. The bottom line is that the contours of letters made of rough paper are glued onto a wooden board. The child needs to circle them with two fingers of the right hand. In this case, an adult must pronounce the sound corresponding to the letter. This exercise involves tactile, auditory and visual memory.
Preparing a hand for writing (5-6 years old) according to the Montessori method includes an exercise in which the child must draw letters on sand or semolina.

Over time, you can use chalk and a board. At the very last stage, children begin to write with a pen on paper. It is believed that the Montessori method is one of the most effective. That is why it is often used by parents and teachers. It also helps develop fine motor skills. Preparing a hand for writing according to the Montessori method takes several months. It is given to the child with ease. Training can start from 4-5 years. Up to this age, you can train your hand in life. As we said earlier, this can be hand washing and various surfaces.
Graphic dictations
Children learn to write at school. However, this knowledge is not enough for them. It is also important to exercise at home. Preparation of a hand for writing (6-7 years) can occur thanks to graphic dictations. Parents need to pre-special templates. You can buy them at a bookstore or prepare them yourself on a computer and then print them out. There is a dot on the sheet in a cell. It is from her that the child will lead the first line. At the bottom of the sheet is a special table. It specifies the length of the line and its direction. Following the instructions, the child will be able to draw the silhouette of an animal or any object.

Such preparation of the hand for writing (6-7 years) develops the imagination. Thanks to the regular conduct of graphic dictations, the child develops attention, fine motor skills of hands and spatial imagination. Drawing by cells is very entertaining and useful. Children like to see the result of their activities in the form of a certain pattern.
Recipe. Overview of preparation aids
Preparing your hand for writing preparatory group often occurs through the implementation of exercises in a special recipe. This method of learning is the most common. However, not every prescription is of high quality. In our article, several tutorials are considered.
The author of the manual "My first prescriptions" is N.V. Volodina. It was published by the Dragonfly publishing house. The design of the copybook is not very bright. However, teachers consider this a plus, since the bright cover can distract the attention of a preschooler. At the beginning of the prescription, recommendations are given in verses, thanks to which training can be made more effective. There are several editions of this manual. In the first edition, the child is asked to complete the most simple tasks. The level of difficulty gradually increases. The latest edition contains tasks in which the child will have to write letters on their own.
"My first prescriptions" were issued in the form of a regular notebook. This is a plus, as the child learns to work correctly with the workbook. The cost of one edition is approximately 50 rubles.

"My first recipes" also have disadvantages. The edition is quite thin paper. In some places, the sheets are translucent, and this can distract the preschooler. The images that are proposed to colorize are quite small in size.
"Preparing the Hand for Writing" is a recipe that was released by the VK Dakota publishing house. It is marked - "5-6 years". Such preparation of the hand for writing (Grade 1) is not suitable for preschoolers. The recipe contains quite difficult tasks. It is suitable for first graders who need to train their writing skills. On each of the pages, a certain element of the letter is processed. The assignments are pretty much the same. It will not be interesting for a restless child to work with such a recipe, since there are no game elements there.
This recipe is for children 4-5 years old. This is a colorful edition with attractive illustrations. Tasks are divided into 14 lessons. Each of them includes 2 pages and a short story about a mouse. There are no tasks with elements of letters in the publication. It only prepares the preschooler's hand for writing. He will need to trace lines, draw dashes and master hatching.
"I draw patterns" - a copybook, which was released by the Eksmo publishing house. It is designed in a copybook quite accessible to preschoolers. You can also find finger gymnastics in it. The paper is thick enough. The recipe is divided into 34 lessons.
Handle selection
When teaching a child to write, stationery plays an important role. The right pen is the key to success. Its length should not exceed 15 centimeters, and its diameter should not exceed 7 millimeters. Various ribbed and square pens are not suitable for writing preparation. Holding them, the child quickly gets tired. It is important that the color of the paste is dark blue or dark purple.
IN Lately the so-called self-taught pens are especially popular. This is a kind of simulator, thanks to which the child learns to properly hold writing instruments and write beautifully. They are also used to retrain lefties. A series has also been released that will allow you to correct the handwriting of a child of 7-8 years old.

Summing up
Preparing the hand for writing in the preparatory group is a difficult stage of learning. How to organize this process not known to all parents. It is the preparatory stage that affects the final result. Proper preparation of the child is the key to his good handwriting. It is important to start it from the age of two. During this period, it is necessary to develop motor skills. A year later, parents can use the special techniques that you have read in our article. Work with writing is recommended to start at the age of 4-5 years. However, you should not teach your child to write letters. Otherwise, he will not be interested in school. Prepare your hand for writing. This will become the basis for obtaining skills in a general education institution.
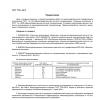
Municipal budgetary preschool educational institution
"Kindergarten No. 12" Zvezdny "
Senior educator of the MBDOU by the decision of the pedagogical council Head of the MBDOU "Kindergarten
"Kindergarten No. 12 "Star" from "___" __________________ 201__ No. 12 "Star" ________ O.G. Berillo
ON THE. Popov protocol No. __ order dated "___" ____________ 201__
preparing the hand for writing
in the group of general developmental orientation No. 1 "Space" for children 5-6 years old
Developer info:
Petrova Irina Igorevna - teacher.
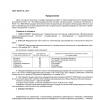
horizontal lines(Learning to draw a path)
To teach children to understand the verbal attitudes of the teacher, to move along the show, to draw straight horizontal lines in the middle, from left to right without lifting the pencil from the paper. Continue to develop the coordinated action of both hands.
Game guide with tape, pencils, demo and handout sheet No. 6
horizontal lines
(tracks for cars)
Continue to teach to draw horizontal lines from left to right, without lifting the pencil from the paper, to form the ability of spatial orientation, to develop fine motor skills of the hand.
Game guide with tape, pencils, demo and handout
dotted lines
(Wonderful handkerchief)
Introduce the dotted line, learn how to draw it correctly. Continue to develop the ability to hold a pencil correctly. Follow the posture of the child, the position of the paper on the table.
Clothespins 1 pc. for each child, pencils, demonstration and handout sheet No. 8
dotted lines
(Decorate a handkerchief)
Continue to develop the ability to correctly draw a dotted line, using it to decorate a handkerchief, adjust the pressure on the pencil (weak, stronger, strong), develop motor skills and hand flexibility.
Clothespins 2 pcs. for each child, pencils, demonstration and handout sheet No. 9
Vertical, horizontal, oblique lines
(Combs for a doll)
Develop hand-eye coordination, a sense of space, the ability to observe the direction of lines (vertical, horizontal, oblique) on a sheet of paper by drawing according to a model
Pencils, unsharpened, 2 per child, counting sticks, colored pencils, demo sheet and handout #10
Hatching with horizontal lines
(Learning to hatch)
To acquaint children with the rules of hatching: draw lines only in a given direction, without going beyond the contours of the figure (square, rectangle). Keep the lines parallel. Continue to activate the motor skills of the hands with the help of finger gymnastics
Small rubber balls, 2 for each child, pencils, demonstration sheet and handout sheet No. 11
Hatching with vertical lines
(Learning to hatch)
To teach children to draw vertical strokes, increasing and decreasing the height of the line, gradually shading the triangle. Continue to develop the muscles of the fingers and hands
Pencils, unsharpened, 2
per child, beans
10 pieces, plates 3
pieces, counting sticks,
colored pencils, demonstration sheet and
handout number 12
Hatching with slanted lines
(Learning to hatch )
Learn to draw oblique lines, gradually shading them with a geometric figure. Develop hand-eye coordination, the ability to follow the direction of the line.
Small rubber balls, 2 for each child, pencils, demonstration sheet and handout No. 13
Point drawing(Learning to draw by dots)
To teach children to trace the drawing point by point without lifting the pencil from the paper, to develop spatial vision, to shade the drawing neatly within the outline of the drawing.
Unsharpened pencils, 2 for each child, beans, peas, plates of 3 pieces, colored pencils, handout No. 14
Wavy line
Learn to draw a wavy line, from left to right.
To consolidate the ability to regulate the pressure on the pencil, to continue to form hand-eye coordination.
Beans, small stones, plates, thin string, colored pencils, demo sheet, handout number 15.
Wavy line
(The waves are big, the waves are small)
To consolidate the ability to draw wavy lines, paint over the drawing within the contour
Beans, small stones, plates, thin string, colored pencils, demonstration sheet No. 15
cutting with scissors
(Carved snowflakes)
To form the ability to cut along given lines, develop visual-motor coordination, motor activity of the fingers
White sheet, scissors, simple pencil, counting sticks, demonstration material
Lines in different directions
(Herringbone - green needle)
Develop imagination, hand-eye coordination, a sense of space, the ability to
respect the direction of the line.
Counting sticks, colored pencils, demonstration and handout sheets No. 16
Colored and white paper, scissors, glue
cutting with scissors
(Magic palms (Christmas tree))
To teach children to cut along the complex line of the contour of their own palm. Develop an eye, motor activity of the fingers.
Thick paper (postcard size), colored paper, paints, brushes, scissors, glue
Drawing and cutting
(Invitation to the holiday)
To educate children in a positive attitude towards others, the desire to invite them to the Christmas tree holiday, to independently use the ability,
received in drawing and applications. Continue to develop hand-eye coordination
Colored pencils, paints, landscape sheet, demonstration sheets
Drawing
(Oh, you are winter-winter)
To teach children to independently choose the content of the picture, arrange objects, convey a simple plot, carefully paint over using techniques
hatching from top to bottom, left to right.
Pencils, felt-tip pens, landscape sheet, demonstration sheet
modeling(Who came to us for a holiday)
evoke an emotional response in children
past holiday, to develop in children
imagination by the ability to convey in modeling
characteristic figurines of characters: animals, fairy-tale heroes.
Plasticine
Lines in different directions
(Frost draws patterns on the glass)
Develop imagination, visual-motor
coordination, sense of space, skill
observe the direction of the lines on a sheet of paper.
Lines of different types: horizontal, vertical, wavy, dotted
(Decorate mittens)
To consolidate the ability to draw lines of different types:
vertical, horizontal, wavy,
dotted. Develop visual-motor
coordination
Foil sheet, 1 pc. for each, colored pencils, demo and Handout №18
Spiral
(Magic ball)
Learn to “unwind” and “wind” balls point by point in the direction of the arrows, form
perception of object forms, visual-motor coordination. Fix the concept of right, left, top corner, bottom corner, top,
bottom.
Balls of thread 1 pc. for each, colored pencils, demonstration and handout No. 19
Spiral
(Magic ball)
Continue building skills on your own
draw balls in free space
sheet.
Balls of thread 1 pc. for each, colored pencils, demonstration and handout No. 19
Hatching
(Shade the drawing)
Continue to form the ability to hatch
only in the given direction, do not go beyond
the contours of the figure, keep the lines parallel,
do not bring the strokes together.
Balls of thread 1 pc. for each, colored pencils, demonstration and handout No. 19
paper torn(Snowman . application)
Develop application skills
breaks, carefully stick the elements of the application .. Develop fine motor skills of the hands.
Colored cardboard, white sheets,
glue, scissors, pencils,
demo material
№21
Drawing semicircles
(Flowers in the meadow)
To teach children to draw a pattern of semicircles according to the pattern on the leaves in a cage, and then color it without going beyond the outline. To form the ability to analyze and reproduce the sample.
Peas, beans, a leaf in a cage,
colored pencils, demonstration sheet No. 22
Drawing semicircles
(Flowers in the meadow)
Continue to teach children to draw flower petals in a semicircular shape. First according to the model, and then independently. Develop imagination, the ability to navigate in space
Small rubber balls
2 pieces each, colored
handout #23
Drawing a round shape
(Treat for friends)
To learn to draw round objects, to form the ability to distinguish the shape, size of an object
Small rubber balls
2 pieces each, colored
pencils, demo and
handout #24
Drawing a round shape
(Treat on plates)
Continue learning to draw round objects
(plates). Independently draw "plates" around the treat
Beans, plates, colored
pencils, demo and
handout #25
Drawing a round shape
(We draw a cheerful snowman)
Strengthen the ability to draw round objects,
continue to form hand-eye coordination, the ability to navigate in space
sheet.
Peas, beans, colored
pencils, demo
sheet number 26
cutting with scissors
(Postcard for dad (application))
To form the ability of children to perform an application using cutting skills: round shapes from squares, oval from rectangles. Cut and paste silhouettes of tanks, planes, ships according to ready-made shapes.
Colored cardboard and paper
scissors, glue, demo No. 27
Drawing a round shape
(Dress for doll)
Learn to draw rings on your own, circles of different sizes, decorating the cut-out silhouette of the dress with them.
Clothespins 2 pcs. for everyone
dress stencil, colored pencils
cutting with scissors(Flowers for mom (application))
To develop aesthetic perception in children, cut out round petals from paper folded several times. Develop manual skills.
Colored paper and cardboard, glue,
colored pencils, scissors,
demo material
№28
Lines of different types
(Decorate hats)
To consolidate the ability to draw lines of different types (vertical, horizontal, wavy,
dashed). Develop hand-eye coordination
Foil sheet 1 each, hat silhouettes, colored pencils, demo sheet, handout #29
Coloring
(The bird sat on the window)
Continue to develop the ability to trace drawings exactly along the lines. Correctly hold the pencil, paint within the contour
Colored pencils, swords, demo, handout No. 30
Wavy line
(The ship is rocking on the waves)
Strengthen the ability to draw a wavy line.
Color within the outline. Ability to navigate in space
Balls, thin shoelaces, colored
pencils, demo and
handout sheets №31
Graphic patterns
(Patterns on the rug)
Continue building skills
navigate on a sheet of paper, independently
draw graphic patterns on the model. Develop
hand-eye coordination.
Balls of thread 1 pc. for each, colored pencils, demonstration and handout No. 32
Drawing
(Spring, streams, the sun shines brightly)
To educate children in aesthetic perception, love for nature, the desire to convey it in
drawing, place the drawing on a wide space of the sheet, consolidate the ability to draw lines in different directions
Small rubber balls
2 pieces each, colored
pencils, demo and
handout #33
We hatch different ways
Continue to form the ability of children to shade shapes in different ways: horizontal, vertical, oblique,
wavy lines, without going beyond the contours of the picture, observe the parallelism of the lines and the distance between them.
Pencils, foil sheet, demonstration, handout No. 34
modeling
(My favorite toys)
To develop in children an emotional attitude to the image, to arouse the desire to independently
choose your favorite character and convey its characteristic features using familiar modeling techniques, develop fine motor skills of the hands.
Plasticine, demonstration material
Learning to write numbers (number 1)Introduce children to a notebook in a cage. Learn to write a number 1. Coordinate your actions with the teacher's instructions, consolidate the concepts of spatial orientation: left to right, top to bottom, upper left corner.
Learning to write numbers
(Number 2)
Learn to write a number 2. Coordinate your actions with the instructions of the teacher, consolidate the concepts of spatial orientation: left to right, top to bottom, upper left corner. Develop
auditory perception, monitor the correct grip of the pencil.
Learning to write numbers
(Number 3)
Learn to write a number 3. Coordinate your actions with the teacher's instructions, consolidate the concepts of spatial orientation: left to right, top to bottom, upper left corner. Develop auditory perception, monitor the correct grip of the pencil.
Learning to write numbers
(Number 4)
Learn to write a number 4. Coordinate your actions with the teacher's instructions, consolidate the concepts of spatial orientation: left to right, top to bottom, upper left corner. Develop attention, concentration, monitor the correct position of the body.
Counting sticks, checkered notebook, pencils, demonstration material
Learning to write numbers
(Number 5)
Learn to write 5. Coordinate your actions with the instructions of the teacher, consolidate the concepts of spatial orientation .. Develop
attention, concentration, attention
correct body position
Plasticine, checkered notebook, simple pencils, demonstration material
Learning to write numbers
(Number 6)
Learn to write 6. Coordinate your actions with the instructions of the teacher, consolidate the concepts of spatial orientation. Develop attention, concentration, follow
correct body position
Plasticine, checkered notebook, simple pencils, demonstration material
Learning to write numbers
(Number 7)
Learn to write 7. Coordinate your actions with the instructions of the teacher, consolidate the concepts of spatial orientation. Develop attention, concentration, follow
correct body position. Improve hand function
Beans, chestnut 2 pcs. for each, checkered notebook, simple pencils, demonstration material
Learning to write numbers
(Number 8)
Learn to write 8. Coordinate your actions with the instructions of the teacher, consolidate the concepts of spatial orientation. Develop attention, concentration, monitor the correct position of the body, pencil. Improve grapho motor skills.
Plasticine, checkered notebook, simple pencils, demonstration material
Learning to write numbers(Number 9)
Improve graphomotor skills.
Peas, checkered notebook, simple pencils, demonstration material
2
Learning to write numbers
(Number 10)
Learn to write 8. Coordinate your actions with the instructions of the teacher, consolidate the concepts of spatial orientation. Develop attention, concentration, monitor the correct position of the body, pencil.
Improve graphomotor skills
1
Counting sticks, beans, checkered notebook, pencils, display material
3
drawing
(Journey ladybug)
To consolidate the concept of spatial orientations: from right to left, upper right and lower left corners, top to bottom, left to right, oblique lines. Develop the ability to finish drawing and place the image on the entire sheet of paper, paint neatly within the outline of the drawing.
1
Small rubber balls, 2 pcs each, colored
pencils, demo and
Handout #35
4
Lines of different types
(fairy flowers)
Strengthen the ability to draw lines different kind: straight, dotted, wavy, spiral, in different directions. Develop imagination.
1
5
Point drawing
(wonderful picture)
Continue to improve children's skill
trace the drawing point by point without lifting the pencil from the paper, color the drawing carefully, correlate the direction of the strokes with the shape of the drawing. Build hand-eye coordination.
1
Chestnuts 2 pcs. for everyone
colour pencils,
demo #37
6
Hatching
(This is how we know how to hatch)
To consolidate the ability of children to shade figures in different ways: horizontal, vertical, oblique, wavy lines, without going beyond the contours of the picture, to observe the parallelism of the lines and the distance between them.
1
Clothespins 2 pcs. for everyone
simple pencils.
7
Drawing by Intention
(This is how we can draw)
To consolidate the ability of children to independently choose the content of the picture, arrange objects, convey a simple plot, carefully paint over using shading techniques from top to bottom, from left to right.
2
Demonstration material, chestnut, colored pencils, landscape sheet.
8
Drawing by Intention
(This is how we can draw (continued)
Chestnut, colored pencils.
Tips for parents: "Preparing the hand for writing in children 6-7 years old"
Writing is a complex coordination skill that requires the coordinated work of the muscles of the hand, the whole arm, and the correct coordination of the movements of the whole body. Mastering the skill of writing is a long and laborious process that is not easy for all children. Preparation for writing is one of the most difficult stages in preparing a child for systematic learning. Psychologists note that in children 5-6 years old, the ability to assess spatial differences, which determine the completeness and accuracy of perception and reproduction of letter shapes, is not sufficiently formed. In addition, children find it difficult to navigate in such spatial characteristics necessary for writing, such as the right and left sides, top - bottom, closer - further, under - above, near - inside, etc.
The accuracy of graphic actions in children aged 6-7 is ensured by muscular control over fine (fine) motor skills of the hands. This is the dexterity of the fingers and hands, the coordination of their movements. The development of fine finger movements can be judged by observing how the child draws or paints over the details of the picture. If he constantly turns the sheet, cannot change the direction of the lines with the help of subtle movements of the fingers and hand, then the level of development of fine motor skills is insufficient.
Thus, the process of writing requires from the child not only physical, intellectual, but also emotional efforts. All kinds of overloads and the overwork associated with them have the most negative impact on the mastery of graphic skills and, moreover, on the development of the child's body. Therefore, at preschool age, it is the preparation for writing that is important, and not teaching it. It is important to develop the mechanisms necessary for mastering writing, to create conditions for the child to accumulate motor and practical experience, and to develop manual skills.
Develop perseverance, diligence of the child, the ability to bring things to the end
Form his mental abilities, observation, inquisitiveness, interest in knowing the environment. Make riddles for your child, make them together with him, conduct elementary experiments. Let the child talk aloud.
If possible, do not give the child ready-made answers, make him think, explore. For example, if he claims that trees die in winter, you can cut a branch with him and put it in the room. After a while, leaves will appear on it.
Put the child in front of problem situations, for example, invite him to find out why yesterday it was possible to sculpt a snowman out of snow, but not today.
Talk about the books you read, try to find out how the child understood their content, whether he was able to understand the causal connection of events, whether he correctly assessed the actions of the characters, whether he is able to prove why he condemns some heroes, approves others, etc.
Special mention should be made of the specifics of teaching a preschool child. It is “oral” in nature, that is, from mouth to mouth. When teaching in kindergarten, we do not use texts, the printed word. Learning is by ear with the use of visual game methods.
A special place in the preparation of children for school is occupied by the mastery of some special knowledge and skills - literacy, counting, solving arithmetic problems. The acquisition of literacy and elements of mathematics at preschool age can influence the success of schooling. It is important that the child is able to hear the sounds of the word, to be aware of its sound composition. Reading should be continuous or in syllables. Letter-by-letter reading will complicate the work of the teacher, since the child will have to be retrained.
One of critical tasks preparing children for school - the development of the "manual skill" of the child necessary for writing.
On the topic: methodological developments, presentations and notes
Tips for preparing your hand for writing
Tips for preparing a preschooler's hand for writing Teaching a child to sit correctly while writing, to hold a pen correctly and to navigate in space must be started already in preparatory school for ...
Approximate planning of classes to prepare a hand for writing for children of the senior group according to the program of correctional and developmental work in the speech therapy group of a kindergarten for children with OHP N.V. Beggarly
Methodological development of classes to prepare preschoolers with OHP for literacy. These classes in their work can be used by both speech therapists and educators. correctional groups. Busy...