The New Year is coming. Do you want to decorate the Christmas tree in an original way, not "like everyone else"? Then your Christmas decorations should be original, hand-painted.
Let's try to turn ordinary purchased toys into unusual ones. We will paint Christmas balls with a contour on glass and acrylic paints. This technique is quite accessible for beginners! For this we need: plain Christmas balls different size, contour on glass and ceramics "Decola", acrylic paints "Metallex", pony brush No. 2, varnish with sparkles "Holographic silver".
At first, I recommend taking a Christmas tree ball with a pattern and trying to draw an existing image from above with a contour on the glass for training. Use an outline of different colors, depending on the color of the pattern fragments on the ball.
Try making nice round "dots" by placing the tube with the contour on the surface of the ball and pressing the tube so as to squeeze out the desired amount of contour liquid. In this way, draw pink flower petals and put yellow dots in the middle of the flowers.

Then try to repeat the contour of the green leaves and fill the leaves inside with liquid. Let's hang it to dry. Thus, I refreshed the already existing drawing on the old ball and practiced working with the outline.

Now we take any Christmas tree toy and draw on it, using our imagination. For example, it is not difficult to draw radial stripes on a toy of this shape, the contour fits well into concave "folds".

We draw from top to bottom with a contour "silver", holding the toy with two fingers of the left hand from above and below. It is difficult to make a mistake and draw a curved line here. Let's hang it to dry. When the outline dries, draw spots all over the toy with a lilac outline. Here is such a New Year's toy turned out!

On elongated Christmas decorations, you can draw delicate flowers with pink petals and green leaves. First, we put the points of the petals with a pink outline in a circle.

Then, with a yellow or gold outline, we put dots in the middle of each flower.

Gently, with a green contour, slightly pressing on the tube, draw green leaves. The toy is ready!

You can try to paint Christmas decorations with acrylic paints using a thin brush. For beginners, I recommend taking a toy of such a shape that simple flat components, such as squares, stand out on its surface. Acrylic paints "Metallex" draw squares on the "equator" of the Christmas ball.

Hang to dry. Then you can use a brush to cover the ball with acrylic varnish with sparkles. It turned out something "cosmic"!

Imagine, come up with drawings and make original Christmas balls with your own hands!
You can also try your hand at painting a New Year's ball with acrylic paints by watching this video master class:
If you want to draw a real winter story on the ball, then check out the following video tutorial on art painting a Christmas ball:
As you can see, the complexity has increased significantly. But you can practice gradually increasing the skill.
Christmas toys are a great decoration for the Christmas tree. Indeed, in New Year The Christmas tree is decorated with various balls and other Christmas decorations. But simple balls on a Christmas tree look very boring. And the painting of Christmas tree decorations, which you can apply on toys with your own hands, will help to revive such toys. But before you start such work, find out what paints are used in this case. So for painting Christmas toys fit:
- acrylic paints,
- glass paints,
- gouache.
How to paint Christmas decorations
Of course, in this matter it is worth starting with the simplest. If you do not have any skills, then just decorate the balloons with beautiful and cute stripes. Also use a variety of patterns in this case.


You have already trained your skills, then try to make various curls and monograms. But in order to avoid mistakes, first try to draw such elements on plain paper.


Christmas decorations can also decorate beautiful snowflakes. Today, there are many options for snowflakes that can perfectly decorate your Christmas balls.


To decorate Christmas balls, feel free to use various materials. But most the best option the painting of the ball is considered. If in winter you lack summer motives in New Year holidays, then draw flowers on Christmas balls.


What New Year can you imagine without birds. They can be located on snow-white snow, branches of a Christmas tree. In general, turn on your imagination and start creating something interesting. It is worth saying that drawing birds is very simple. You first draw a rounded spot that will be the tummy. Make another stroke, which will be the tail. And do not forget to draw a beak and eyes.


Very easily and also very quickly you will be able to paint Christmas balls with Christmas trees. Check out some of these examples.


A hut that is covered in snow will look very interesting on Christmas balls. Choose for yourself the perfect option for painting a Christmas ball.


The main companion of each new year is Santa Claus and various fairy-tale characters. Therefore, their images may also appear on your Christmas balls. 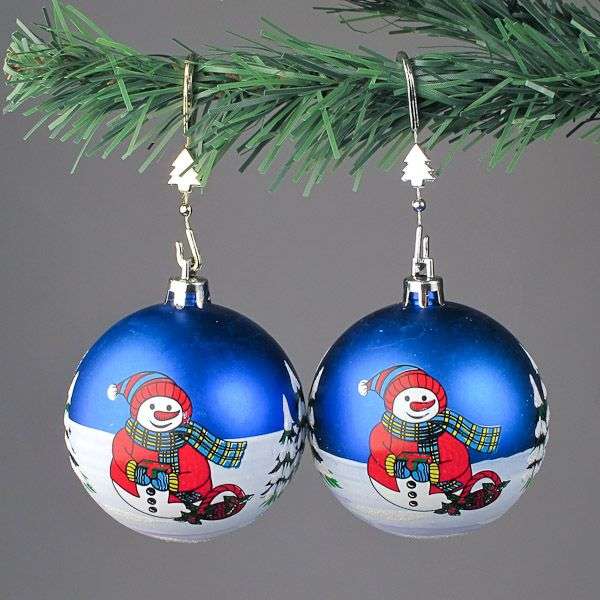

A Christmas ball can also be decorated with a fabulous angel. Indeed, such a painting will fill your Christmas tree with extraordinary magic.


As you can see, there are a lot of options here and how you decorate your New Year's ball depends only on your imagination.
How to paint Christmas balls
Above you could see examples of painting Christmas balls. However, painting such toys can be difficult. And now it is worth giving the basic rules that will allow you to cope with this work.
- So, first draw a sketch on paper.
- It is worth using a felt-tip pen or pencil to draw the outlines of the future image on the balls.
- And now, we take the paints and start drawing over the pencil outlines.
- First, paint one side of the balloon. And let the paint dry. When one side of the ball dries, we begin to paint the second side.
- At the end, the ball is varnished.
How to transfer the image to the surface of the ball.
- Decided to decorate your ball with a beautiful image then follow these steps.
- Attach a transparent plastic bag to the picture you like.
- Circle the picture with a marker.
- Attach the bag to the ball with the side where you drew the contours. Gently press down on the package so that the outlines are printed.
- Circle the print that turned out with a felt-tip pen on the ball.
- Next, just color the drawing.
Remember all these tips and then you will get the most interesting New Year's toys that will attract the attention of all your guests on New Year's Eve.
Perhaps the most common shape of a Christmas tree toy is a ball. Traditionally, the Christmas tree is decorated with balls of different sizes, but of the same color scheme, or, conversely, they take balls of the same size, but of different, matching colors. But every year it becomes more and more popular to make New Year's toys with your own hands. That is why we will learn how to make ball-shaped Christmas decorations using a variety of needlework techniques!
Balls of beads, buttons and threads
To one of the most simple ways Decorating Christmas balls with your own hands can be attributed to gluing them with threads or decorative cords. To make the ball look more festive, take a string of beads with the cord and glue them, alternating with each other.


Balls of buttons and pasta
Even children can stick multi-colored buttons on the balls, and you just have to admire the result and help them a little if necessary)


And instead of buttons, you can stick pasta or coins, and you will get the most unusual Christmas balls with your own hands!
Pre-wrap a foam or any other ball with golden foil to mask the gaps. Alternatively, after gluing small parts, the whole ball can be painted with golden spray paint.

Balls of thread
Making balls of thread is also not at all difficult. An ordinary ball is taken as a basis (you can use an old Christmas tree toy, with which, for example, the paint has peeled off in places) and wrapped with knitting threads. Show a little ingenuity and it will turn into a ball ball! Knitting needles are made from toothpicks and a pair of wooden beads.

Another method is based on the use of a balloon in the work, which is wrapped with threads lubricated in PVA glue. You can wind the threads in any order, and at the end it doesn’t hurt to smear the entire surface with glue again.

After the glue dries, pierce balloon and carefully remove it, and decorate the finished ball of thread with a festive bow.

paper balls
All you need to make this cute paper ball is pretty paper and glue.

Felting balls is another interesting way to create a unique Christmas decoration with your own hands!
There are two ways to felt wool balls: one is called dry felting, and the other is wet) The result is equally good if everything is done correctly.
Balloon painting
And finally, another simple way to decorate Christmas balls is painting. It is made using a gel with sparkles of various colors.

Take the right color and draw whatever comes to your mind) By the way, involve children in this activity, they will be delighted!


We hope that from the variety of options offered, you will choose one or several suitable ones for yourself, and your Christmas tree will be decorated with exclusive handmade Christmas balls!
Happiness and creative success in the New Year!!!
CategoriesChristmas balls - an integral part of Christmas tree decorations. Of course, you can always buy Christmas balls in the store, but you must admit, DIY Christmas balls are something special! In addition, if you have time and desire, you can easily make your unusual New Year's toy in the form of a ball, and we will show you several ways to make a Christmas ball with your own hands.
 
To begin with, let's make a reservation that in order to make a New Year's ball you will need a base: it can be an old New Year's glass ball, a plastic ball, a foam ball, a foam ball, or even a papier mache ball. True, in the latter case, you will have to tinker, but I will not dwell on how to make a papier-mâché ball. Let's agree that you already have the base and talk about how you can decorate / change the old ball or make a new one from transparent glass (plastic) balls.
DIY Christmas balls master class
Everyone has old Christmas balls - therefore, we start with them. The simplest thing you can do with last year's Christmas ball is to wrap it with some beautiful fabric, tie a thread for hanging, then at your request: tie it with a ribbon, add some more decorations (spruce branches, berries, snowflakes, lace - everything whatever you like). It turns out very beautiful New Year's balls, and most importantly, the next one, you can remove all the decor and do something new.


And you can use not a single piece of fabric, but strips or ribbons. And in this case, again, you can use the old New Year's ball or any other round base.


New Year's balls pasted over with round fabrics look good.

Or even Christmas yo-yo flower balls. By the way, they are made very simply. We cut out a circle template from cardboard, circle it on the fabric, cut out the circles from the fabric. We sew our circles of fabric along the edge with a thread (photo No. 3), then tighten the thread - the seam should be in the center, fix it and cover it with a piece of fabric and a bead. Glue the finished yo-yo flowers to the ball. We decorate the top with twigs, cinnamon sticks, roses, etc.

In addition, beautiful multi-layer Christmas balls are obtained from the fabric. True, in this case, you need a foam ball and tailor's pins. The technique for making such balls is shown in the photo. In principle, nothing is difficult, and most importantly, you can create different color combinations.


In addition to fabric, you can also use a lot of materials to decorate Christmas balls. You can glue them with sequins, threads, acorn caps, pistachio shells, buckwheat, buttons, pieces of old CDs, strips of paper and even tree leaves.


And you can make charming New Year's cupcakes from old balls, as shown in the photo below.


Or from a foam ball and large sequins.

Christmas balls with snow
Christmas balls with snow - of course with artificial snow are just great! Do not know how to make artificial snow with your own hands? In fact, everything is simple, in order to make artificial snow with your own hands you will need: semolina, white paint and glue. We mix everything together and the artificial snow is ready (experiment with the proportions, because there are no comrades for the taste and color). With the resulting mass, we cover the balls in whole or in part, let them dry, decorate from above with sparkles, beads, ribbons, etc. It turns out original Christmas - New Year's balls.


A similar effect (not so textured, but still) can be achieved using ordinary white paint - you just need to apply it with a sponge - in several layers.


Decoupage Christmas balls
Decoupage is always beautiful, and decoupage of Christmas balls is doubly beautiful. We glue “background” pieces on the ball, then the main pattern in the first photo is: an angel in front, and flowers in the back. Then we apply glue on the ball in places (on the top, in the center of the flowers) and apply the potal, “press” it with a piece of cotton fabric. Next, with light movements of the brush, we brush off the potal from the areas not covered with glue, at the end, you can varnish the ball. And, of course, we attach a beautiful loop.

Decoupage of New Year's balls can be done in different ways: using not only the potal, but again artificial snow or even coarse salt - unusual New Year's balls are obtained.


Another idea that deserves attention: not just decoupage, but decoupage with voluminous contours. In the first case, a napkin is glued, and then the same flower is glued on top, previously glued to thick paper (cardboard). Then, with the help of glue and sparkles, we create more voluminous bright accents - it turns out cute.

In the second case, we use volumetric lace. Cut out the necessary details. We apply soil to the ball. Then glue the pieces of lace. After the glue dries, paint the ball with white acrylic paint. Next, the most difficult: on the palette, mix wax and dark brown oil paint. Apply colored wax to the surface of the lace with a brush. Then we rub the wax into the voluminous surface with a foam sponge or sponge, thereby revealing the relief. With a cloth with a solvent, remove excess wax, brightening the surface gaps between the lace and the protruding parts of the lace. Next, rub a colored wax patina into the decorative surface of the ball with your finger, giving an even more aged look to the product.
Now let the patina dry for a few hours. If desired, the surface can be protected with an alcohol varnish. The varnish must be applied in two layers, allowing each to dry properly. The varnish will allow you to wipe the surface with a damp cloth. We decorate the finished ball with ribbons and admire the result!

Decoration of transparent Christmas balls
Transparent balls are no less interesting to work with. Firstly, glass balls can simply be filled - with what? Anything! With threads, strips of paper, pebbles, berries, cones or even sand with shells - you get an original sea ball.


And you can glue them on the outside. The palm print looks original; it can be made with paint or pure sparkles.


It turns out in an original way if you apply glue to the ball, let it dry, then wash it off - you get a slightly pale glass (frosted).

And you can paint them from the inside, and make a painting on the outside.


Those who have detachable balls can only be envied. You can make it difficult to paint Christmas balls, but work hard and make an unusual composition inside - a three-dimensional image, as you did before when decoupage balls. Reuse gold leaf, artificial snow, beads, etc.


Styrofoam Christmas ball decoration
Shown above are beautiful layered fabric balls paired with tailor's pins. Using the same pins, you can beautifully wrap the balls with threads, ropes, twine.

The beauty of foam balls is that they are “soft”; you can make cuts in them with a clerical knife, into which you can insert fabric or paper with a nail file. You can immediately press paper or fabric without a preliminary cut. And then we glue the seams with beautiful lace, ribbons or beads. By the way, using this technique, you can make images on the balls: stars, Christmas trees, cakes, etc.


And if you make a small basket of cardboard or wire and attach it to a balloon, you will get a charming toy in the form of a balloon.

By the way, a New Year's toy: a balloon can also be made from glass balloons.

Buy ordinary plastic round toys, a brush, acrylic materials in the store: contours, paints. And start implementing your bold ideas.
Applying curls with acrylic paint with your fingers.
Apply a few drops of acrylic paint of different colors to the surface of the balloon. finger, roundabout smear it. You should get something similar to curls. First make a pattern on the first half of the ball, let dry. Finish painting on the other side.
A beautiful pattern on New Year's balls with a hard brush.
Dip the tips of a hard brush into the paint. Pinch the bristles closer to the tips with your fingers, flattening the brush itself a little. This method will increase the captured area when applying smears. Sweep the brush over the ball with rough strokes.
The most spectacular combination is when strokes of gold or silver paint are enticingly drawn on a dark ball.

Painting a ball with a sponge stencil.
First you need to make a stencil from a sponge. Cut it into any shape, dip it in gold or silver acrylic paint. Now print it (put prints) on the surface of the ball. Decorate the whole ball.
If you use two colors, you can make a small overlay of one stencil on another. Leave the ball to dry. Apply any pattern with an acrylic outline.

Decoration of the New Year's ball with acrylic embossed (volumetric) paste.
An ordinary ball can be decorated with embossed paste. This is done very simply. Use your fingers to apply the voluminous paste to the top of the ball, where the loop would normally be. Apply the paste to make a pea. Leave to dry. As the paste hardens, paint with an acrylic outline, applying any pattern.
If you are not satisfied White color paste, then it can be tinted with a different color of paint (necessarily acrylic). By adding blue or cyan paint, get the effect of snow like on old postcards.

Decor balloons with acrylic contour paint.
Acrylic outlines are a godsend for quickly and easily decorating Christmas balls. They apply inscriptions, any patterns. The thickness of the contour depends on the nozzle in the tube, but it varies and depends on the manufacturer. contour painting can be combined with other techniques for decorating Christmas tree balls.

Artist: Larisa Sosnovskaya.
Using acrylic paints, contours, paste, you can easily make beautiful Christmas balls. The painting on your balls will be unique, because each of them is unique. You can make a name ball by writing the name of the future owner on it. This gift will please anyone. Make the New Year unforgettable for your friends!
This master class is dedicated to the Christmas ball, which is made in decoupage technique.
For a New Year's painted ball, we need:
- plastic ball;
- napkin with a New Year's pattern;
- scissors with a thin blade;
- sponge;
- a thin brush for paints;
- fan brush;
- synthetic brush for varnish;
- white building paint;
- white;
- acrylic paints;
- mother-of-pearl acrylic paints;
- sandpaper;
- PVA glue;
- decoupage varnish;
- a container with water;
- contours on glass;
- silver sequins;
- a stick to hold the ball;
- decorative ribbon 2.5 cm wide;
- narrow silver ribbon 1 cm wide;
- lurex thread;
- pin;
- glue "Moment";
- semolina.
From a variety of napkins, choose any you like with a pattern that matches your balloon size.

Cut out the desired fragments from a three-layer napkin.

Before applying the pattern to the ball, it must be primed, we will do this with white construction paint using a sponge. We prime the ball in five layers and be sure to dry each applied layer. You can speed up the drying process with a hair dryer.

To make it convenient to hold the ball during painting, we advise you to put it on any stick or old knitting needle. We cover the ball twice with acrylic white paint - whitewash. We dry.

The surface of the ball should be smooth, without roughness, which can tear the thin layer of the napkin when sticking.

We wipe the ball from the "colorful" dust. We prepare the glue - we dilute the PVA with water 1: 1. Separate the top layer from the cut out fragments.

We apply it to the ball and glue it with a fan brush. We fill the Christmas tree ball with New Year's motifs and wait for it to dry.

We cover the motif with varnish. Dry with a hairdryer. We look at what colors are present in the pattern and select paints. We cover with blue a T-shirt on a boy, a ribbon, an envelope and the eyes of a bear. We shade the gift box and glove with green mother-of-pearl.
So that the glued plot from the napkin does not seem like an applique, we paint with paints. We apply red paint, thereby making this color juicy in the picture.

With yellow mother-of-pearl we shade the ribbons on gift boxes and everything else where it is present. From the photo you can see how the drawing is transformed, it becomes realistic.

With brown mother-of-pearl paint, we draw hairs on the teddy bear, creating the illusion of volume.

For the background we need blue paint, to obtain it, mix white and blue paints. We paint over the ball, in hard-to-reach places, be careful not to cover up the illustration.

New Year's decoupage- the most fabulous decor items. While our ball is drying, we knead the snow. In a small jar, mix PVA glue, whitewash, semolina. We add white paint in order to snow from semolina was not beige.

Stir thoroughly and see what is missing, the composition of the snow should be the consistency of sour cream, in which there is a spoon. Since our ball is made in blue, White snow doesn't really fit with it, so we add some blue paint to it, which should have remained from the background.

Mix well and apply thin layer to the bottom of the ball, depicting a boy and a bear cub standing in the snow.
We try to make the snow fall in an uneven layer, and slightly resemble snowdrifts.

On the wrong side of the ball - on a blue background we make small snowflakes, an imitation of falling snow. For greater expressiveness of the whole “winter story”, we take gold, red and green glitter outlines on glass. We paint the ball with them, creating shine and volume to things.

We cover our miracle ball twice with varnish. Dry with a hair dryer.
To make the snow sparkle and shimmer more, we take out silver sequins, dip the tip of a thin brush into decoupage varnish and dry sequins, quickly transfer them to the ball, trying to distribute them so that there is no heap. You can silver the colorful image itself a little, but the main thing is not to overdo it! Cover again with a thin layer of varnish and let dry.

We cut off from a decorative ribbon with a metal interspersed 35-37 cm, from a narrow silver 20 cm, fold it in the form of a bow and fasten it with a pin.

In the meantime, we fold the lurex thread three times with a total length of 25 cm, cut off and fasten the rolled bow with it. We hide the end of the thread and cut it off.

Glue the bow to the ball suspension. For this purpose, hot glue or super "Moment" is suitable.

Christmas ball in decoupage technique.
Thanks to the technology decoupage”, any ordinary-looking object can be made original and inimitable.

Snow ball!
Balls made in the same style will be a wonderful decoration for a New Year's fairy tree.

Christmas ball with snow, made in the old decoupage technique!
Handmade has always been in price and a ball decorated with your own hands can be a wonderful welcome souvenir for the New Year.
A nominal souvenir of the year in the form of an animal will become unnecessary next year, and Christmas ball will last for many more years. You can make a tradition, make a ball every year, writing the date on it. In a few years you will have an invaluable collection of such hand made balloons.


