About painting
Dyeing fur with hair dye at home is now very common. The fur of mink, khanorik, kolinsky, marten, muskrat and other animals can be dyed with persistent household cream paints. Currently, there are a large number of different cream paints on the market, prices range from several hundred to tens of rubles.
For painting fur, it is desirable to choose a paint that is not expensive, light-resistant and resistant to the aquatic environment. It is very convenient to dye small skins, pieces and ready-made sewn caps for hats with such paints. One or two packs are required per skin, depending on the size of the fur and on the pubescence. Paint is the contents of two tubes: a tube of paint and a tube of oxidant (peroxide). After mixing the contents of two tubes in a separate bowl, the paint is applied by spreading and rubbed into the fur with a swab.
When dyeing fur with oxidizing or acid dyes, there are many inconveniences. For example, when dyeing with oxidative dyes, it is not advisable to dye one or two skins or a sewn fur cap for a hat, since several components are required: black urzol for fur D, catechol or resorcinol, ammonia 25%, salt and oxidizing agent (perhydrol 30%). Before dyeing, the fur must be etched in chromic acid in an acidic environment. The processes of etching and painting are long, take almost the entire daylight hours, painting is carried out by the dipping method in separate baths at a temperature of 35-38 degrees.
When dyeing fur with acid dyes, the skins need to be tanned with an increased amount of chrome tanning agent so that the skins do not boil. The temperature of the dye solution is 60 - 65 degrees.
It is not advisable to dye fur in small quantities; it is more economical to prepare a batch of skins and spend the whole daylight hours on dyeing.
When painting fur with hair dyes, everything is much simpler, you can dye one or two skins in 1 - 2 hours, using a spread method, rubbing the paint into the fur. In this case, one or two packs of paint are spent. The costs are small.
What hair dyes can be used
From a large number of household cream paints, you need to choose those paints that provide the dyed fur with good resistance to light, water and mechanical stress. When painting mink fur, depending on whether the fur is old or new, the paint consumption is small. If we need to dye skins with long-haired fur (arctic fox, fox, silver fox or sable), the dye consumption increases significantly, especially when dyeing light skins in dark colors and new fur. In this case, the question of price is acute.
For painting mink, muskrat and other fur skins, such stable household hair dye creams have proven themselves well: FARA, IMPRESION +, PRESTIGE. Dyed things retain their color for 2-3 years, are not washed off with water, almost do not differ in color from natural undyed skins.
 Paints Fara, Impression, Prestige
 Selection of shades for different colors of fur
You need to paint the fur in a tone that will be an order of magnitude darker than the existing one. For example, if you need to dye brown mink fur, be sure to take the paint darker. FARA - dark brown No. 502 is suitable for natural brown mink. Mink fur, like any other, is dyed differently. New fur that has not been exposed to the sun (new skins) dyes very poorly, you have to increase the concentration of paint by adding a darker one.
So, for example: in the dark brown paint FARA No. 502, you can add half a tube of black paint No. 501. You can increase the concentration even more by adding half a tube of dark brown #502 to a tube of black #501.
New mink or muskrat fur is poorly dyed, so after drying, it is often necessary to re-dye it in the same way in order to achieve dark shades. Old (worn) fur of mink, muskrat and other animals that has been exposed to the sun dyes much better and the longer the fur was worn, the more intense the color. Within 30 minutes or an hour, the hide is dyed completely with dark brown FARA No. 502 or No. 501.
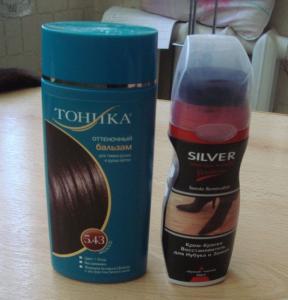
 Shampoo IRIDA
 Light colors of fur, for example: it is better to tint a gray or blue mink in the same tone with hair dye - IRIDA. For yellow or white mink, it is also better to choose a paint to match. After dyeing, the fur is updated, the color becomes brighter and richer. Light new skins are dyed in dark colors with difficulty, often it is necessary to repaint, increasing the concentration according to the above method. There are no such problems with old light fur, it is well dyed black or brown.
It is better to tint long-haired fur (arctic fox, fox) in a natural color, choosing paint according to color. When painting in dark colors, and even when new skins, the paint goes many times more.
Preparing the item for painting
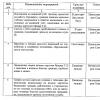
 Worn and moth-eaten places
 Fur skins, separate pieces or a ready-made sewn fur cap for a hat must be prepared for painting. First, fur skins need to be tested for exposure to water. Fur, before being dyed, must be degreased, cleaned of contaminants by washing. Then it is thoroughly washed in water, dyed, washed and washed again. Skins, due to long-term storage or wear, new skins due to improper dressing, can lose their strength and swell and tear when they get into the water. That is why all skins must be tested for water before dyeing. Separate pieces or thin places of the skin are wetted or thrown into a bowl with warm water and observed for 10-15 minutes, if nothing happens to the skins, they remain strong, such skins can be dyed. It happens the other way around, the skins swell, with a slight stretch they tear, and even worse they become limp, like blotting paper. Such skins must be discarded, otherwise there will be big problems.
Before painting on the skins, defects are eliminated: bald spots, worn and moth-beaten places, bites and tears. These places are cut out in the form of a fish, inserts are sewn in, or simply cut out and sewn together. Weak skins, especially at the seams, are strengthened by gluing strips of non-woven spunbond or interlining with MOMENT 1 glue. MOMENT 1 glue is ideal for skins.
The process of dyeing natural fur with hair dye
Before dyeing, the fur skin or fur cap for the hat, which you cut out and sewn from whole skins or worn fur (an old hat or collar), must be degreased by washing, since greasy and dirty hair is poorly dyed. There are not stained places, spots.
Prepare water at room temperature in a cup, add a small amount of washing powder and wash gently. The skins should already be tested for water, as sometimes the skins swell and tear from the water. So that the skins do not tear, they wash them without sudden movements and try not to twist them when wringing out. After washing, the skin is rinsed in clean warm water, squeezed lightly and prepared for dyeing.
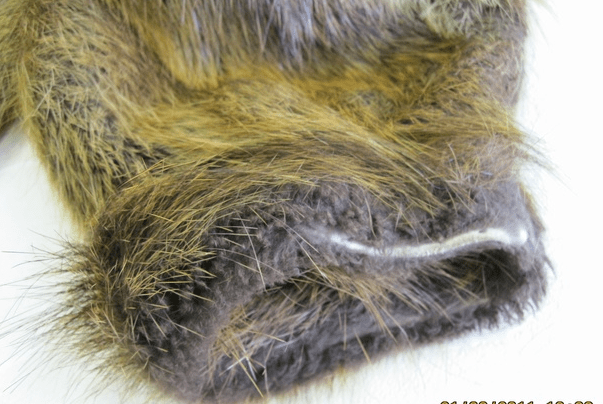
 Paint preparation process
 The paint is prepared according to the instructions enclosed in the box. Hair dye and an oxidizing agent (peroxide) are squeezed out of the tube into a separate bowl, everything is mixed well. The paint is smeared with a sponge on the skin or a sewn fur cap and rubbed into the fur. The skin is rolled up and placed in a bowl. After 10 - 15 minutes they come up, and again the paint is well rubbed into the fur. Constantly watch how the skin is dyed. After half an hour, darkening of the fur appears (in the case of painting the mink brown), the longer the painting, the darker the color. Worn fur is dyed faster.
At the end of dyeing, the skin is rinsed in clean warm water, and then washed with powder in warm water, rinsed several times until clean water. The skin is wrapped in a towel and gently squeezed without twisting, so as not to tear. Then the skin must be dried.
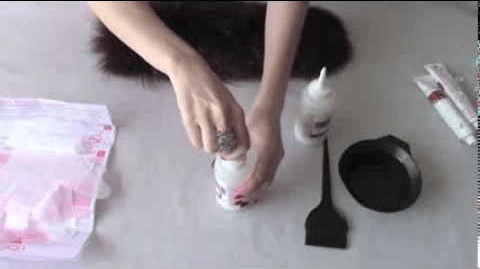
How to dry fur
To dry dyed fur, you need to use a hair dryer, it is best and more efficient to use an old-style vacuum cleaner with a reverse draft. Under the influence of an air jet, the fur dries quickly and fluffs up. If these are new skins and not cut along the tummy, they can be pulled over the rules with the fur outward and dried. The cut ones are stretched with nails on the shield with the fur outward, after drying they are removed and crumpled. Such dyed skins can later be used for sewing new hats or for repairing fur coats. Ready-made sewn and dyed fur caps for hats made by molding are dried with an air jet and pulled on a block in a half-moist form.
When repairing mink coats, sometimes you have to tint brown fur right on the coats. The paint is rubbed with a swab into the burnt place, after staining it is quickly washed off with water and dried with an air stream.
A few secrets...
In the manufacture of fur hats using the molding method, when sewing fur caps, sometimes you have to insert light fur. After dyeing, pulling on a fur cap and drying, it turns out that light fur is different in color. In this case, you can tint the skin right on the deck by pulling out the nails. High concentration paint is reapplied to the unpainted area. After dyeing, the paint is washed off, the fur is quickly dried with an air jet.
As a result of prolonged wear and strong exposure to sunlight, mink fur becomes hard to the touch, such fur must be checked before cutting. A piece of such fur is dyed separately, after drying the fur turns disgusting, the ends of the hair turn gray, the color is very bad. Sometimes in a hurry, such fur appears already on the finished cap, then you need to cut this piece out and replace it with a good one.
Often relying on the quality of the skin, it turns out that after dyeing the skin begins to tear. You can get out of the situation, pull the dried cap onto the finished block and glue the entire cap with pieces of spunbond using glue MOMENT 1. When pulled on the finished block, the skin will no longer tear.
When sewing a fur cap for a hat made by molding, you need to remember that the skins decrease in size after dyeing and drying, so the cap is cut out more in the beom.
Other staining methods
Fur can be dyed in many ways. For these purposes, there are oxidizing, direct, active, acid and a number of other dyes, including natural preparations. When painting, the dipping method is mainly used and less often the smear method. All these methods are time-consuming, require, in addition to the use of basic dyes, a whole range of additional preparations.
When painting fur at home, it takes all daylight hours. The finished fur product (hat, fur coat, vest) cannot be dyed using the dipping method, it is necessary to separate the fur skin from the lining material, and during dyeing, shrinkage of the skins is possible, the skins decrease in size when dried. You can tint some defective places (worn or burnt out), for example, on a fur coat or hat, rubbing the paint into the fur with a brush, and then quickly rinse with water and dry. With this method, household cream hair dyes have proven themselves well. Sometimes such problem areas are tinted with aerosols, by spraying paint.
Spray for dyeing fur
Often, finished fur products (hats, fur coats) look excellent when worn for a long time, but burnt spots appear in some places. In this case, there is no need to paint the whole thing, it is enough to tint problem areas with a spray.
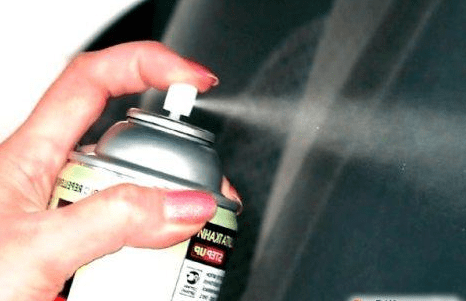
For dyeing fur, you can use paint - an aerosol for suede care. It is a metal can of spray paint.
 Aerosol for suede care
 You need to choose the right shade correctly, otherwise the dyed fur will differ sharply from the main one. The area to be tinted is cleaned of dirt, can be degreased with alcohol, wiping with a swab. It is desirable to cover the fur with any material, except for tinted spots. We spray the paint at a distance of 30-40 cm so that the fur does not stick together and a uniform color is obtained. In this way, you can get an excellent result, the painted places will not differ much from natural fur, the paint will last for several months.
Care for dyed fur
 As a result of dyeing fur skins, individual pieces, fur caps for hats with persistent household cream hair dyes, carried out by spreading, by rubbing the dye into the fur, we get a stable color. The paint for a long time when wearing the fur is resistant to light, water and mechanical stress. Such things do not require special care, the same requirements as for any fur product.
For fur dyed by spraying, the requirements are completely different. The color is not particularly resistant, so it is better to protect such a product from the influence of light, water, mechanical stress and elevated temperature. 
In order for the paint to hold better and the fur to shine, it can be treated with a special balm for the care of dyed hair. After such processing, the fur becomes softer and fluffier.
Fur products require daily care, comb more often, require thorough cleaning. Much depends on proper storage. Fur should be covered and stored in a dark place.
Natural and artificial fur are very beautiful materials intended for tailoring exclusive clothes. Unfortunately, despite the high cost, they are prone to fading from ultraviolet radiation. Precipitation spoils them, other adverse factors, as a result, the brightness of products decreases.
To prevent a fur coat or hat from looking shabby, you need to learn how to dye fur at home, and use one of the methods.
Artificial material is much cheaper, less susceptible to adverse external influences, although it can also deteriorate and take on a worn look. You can also paint it, but not every tool is suitable. With the wrong selection of paint, hairs will come out, the material will shed heavily without the possibility of recovery.
Where to start painting
Before starting work, you need to carefully inspect the product. If it has traces of moth activity, other mechanical damage, “bald patches”, staining will not save the situation. It is better to take the thing to the studio, where they can give it a second life. The fur needs to be combed, cleaned of debris, dust, all impurities, so that the paint is light as evenly as possible. Next, you should choose the appropriate option for working with fur products.
How to dye fur: artificial and natural
Experts advise using for this purpose professional compositions designed specifically for dyeing fur skins. Such products are especially recommended if the hairs are thick and long. You can use hair dye, but you have to buy several packs, which can be quite expensive. There is an option to cover fur products with aerosol, which is sold in hardware and shoe stores. Such a tool can only refresh the ends of the fur. It is not possible to paint over the entire thickness of the material with an aerosol. For full coloring, you will have to buy a special tool or hair dye.
Before work, it is necessary to carry out a test for the degree of aggressive effect of the paint:
- dilute a small amount of the product (if it is powder);
- lubricate the material in an inconspicuous area;
- withstand the time specified by the instruction;
- wash off the paint;
- assess the condition of the material;
- start full dyeing, if the fur has retained its quality, has not changed its structure within 2 days.
When you want to make fur 1-3 tones lighter, you can use not paint, but clarifier. The most commonly used means are "Supra", "Blond" based on ammonia. It is better to paint artificial products only with specialized compounds with a note about this possibility. Hair dye will immediately ruin this material, so it's not worth the risk.
Coloring with paint for curls
In its structure, fur resembles human hair, so its color can be completely changed by a means familiar to every woman - hair dye. Similar products are sold in any supermarket, household chemicals store, and the choice in terms of prices and shades is very diverse. When buying, you should consider the following mandatory requirements for paint:
- durability (usually acquire means that can paint over gray hair);
- the tone is at least one shade darker than the color of the hairs;
- gentle composition, no caustic substances.
If you want to lighten dark material, you first have to discolor it with the appropriate paint. Next, re-staining in the desired shade. It happens that white fur turns yellow from long wear. It will also have to be discolored before staining, otherwise the yellowness will distort the selected shade. For fox fur, you need to purchase more paint than for mink, rabbit. For a long fur coat, up to 5-6 packs of paint may be required.
Spray for dyeing fur
If the tips of thick fur are burnt out in the sun, it is not necessary to carry out its full coloring. Sometimes it is enough just to paint the discolored part, and the thing will shine like new. To update the fur, you need to purchase a spray for suede in a bottle, but you should not save on its quality. A low-quality product can stain hands, things, and human skin for a long time.
Using spray paint is very easy. You need to hang a fur product on a hanger on a balcony, terrace, or cover all surrounding surfaces with cellophane. Then spray paint from a distance of 40-50 cm, working through each area. After finishing work, you need to comb the fur, let it dry well. For drying it is permissible to use a hair dryer. Usually the result is enough for one season, then the thing will need to be painted again.
Selection of shades for different colors of fur
Coloring without preliminary discoloration should always be carried out in a tone darker than the original one. For example, to update the classic brown mink fur, you need to buy a dark brown dye. If the fur is new, has not been worn, has not burned out at all, it will be difficult to paint over it, since the pigments do not fit well on such material. You will have to add not only more funds, but also take a darker shade. This is easy to do: you need to pour a little black into the brown paint.
Gray and blue mink are usually dyed the same color, choosing the appropriate tone for the hair. The material will not change the shade, but it will become brighter, more saturated. Long-haired fur should also be dyed in a tone close to natural, because for high-quality dyeing of hairs, you will have to make a lot of effort and buy several packages of the product.
What is needed for work
Before starting the process, you need to prepare water, hair dye or a specialized product, a bleach preparation (if necessary). Also, to wash the fur, you will need soda, ammonia, salt, and a mild detergent.
Stages of dyeing fur
To get a good, lasting result, you need to consistently follow all the steps and do the work carefully.
Preparing the item for painting
During wear, the thing became very dirty, began to shine, particles of fat settled on it. It is impossible to wash fur products with the usual method: they will immediately deteriorate in the typewriter. Therefore, for cleaning and subsequent uniform laying of the paint, it is necessary to carry out a special treatment with an alkaline solution.
Fur cleaning
To clean the material, you need to prepare a solution from:
- 2 liters of water;
- 2 tablespoons of soda;
- 2 tablespoons of salt;
- a tablespoon of dish detergent;
- 3 drops of ammonia.
All components must be diluted with water, shake the solution well. Hang the product on a hanger. Lubricate the skin (skin) with glycerin, after opening the lining. You can skip this step if you manage not to wet the skin. Otherwise, it may crack or shrink after drying.
Comb the fur, use a clean sponge to process the prepared product. Thick wool should be moistened with a brush, evenly distributing the liquid over the surface and carefully grabbing the undercoat. After 10 minutes, wash off the solution with clean water, being careful not to wet the skin. Then dry the product well in the open air, in a ventilated area. You can’t hang it near the battery, you can’t stove!
In addition to this recipe, there are a number of products that are suitable for cleaning fur:
- equal parts of 4% vinegar, water, alcohol;
- animal shampoo solution;
- professional cleansing spray (Furasol or other).
Color fixing
To fix the color, a solution is prepared: 5 tablespoons of table vinegar (9%) are diluted in two liters of water. After the product is sprayed with a fur product. If the dyeing was carried out with hair dye, you can apply the attached balm to the fur. This will make the product incredibly soft, silky. The balm is applied as on the hair, washed off after 5 minutes, and only then the pigment is fixed with vinegar.
Drying
When all work is completed, the fur must be dried. To do this, the thing is placed on strong wide coat hangers, which should fit well in size. It is advisable not to take metal coat hangers (wooden ones are ideal). The product must be brought into a warm room, but placed away from heating appliances, and allowed to dry. Before complete drying, you can apply a little glycerin to the fur and comb it, setting the desired direction to the pile. Usually drying takes 2-5 days depending on the type of fur and the size of the product.
Fur care after dyeing
Over time, the hairs of old fur can become stiff, fade even after dyeing. To fix the problem, you can periodically rinse the product with hair balm. It is better to take the tool that comes with the paint (you can buy inexpensive paint and pull out the balm). Sprinkling things with a solution of vinegar 9% (a spoonful in a glass of water) will also add shine. The effect of painting in any case will be temporary. Once a season it is worth tinting a thing so that it does not lose its gloss and always looks attractive!
Often a favorite fur coat or vest loses its appearance, while other characteristics are still quite excellent. The villi fade, fade and give the product a very worn look. If you still want to enjoy the warmth and comfort of your favorite thing, then you can shade it a little. But not everyone represents how to dye fox fur at home.
You can not bother with self-painting, but give the product to a special workshop, where everything will be done quickly and professionally. But the cost of such a service is often prohibitive. It will be much cheaper to learn how to dye natural fur and do this work yourself.
Important: Please note that if the product is still new, then it is categorically not recommended to dye it just to change the color, since any dyeing of the fur reduces its service life.
Each type of fur is beautiful and original in its own way. Painting each of them also has its own characteristics:
- White rabbit, chinchilla or mink fur is the easiest and easiest to dye, because it does not require pre-lightening. You can use any color that can cover the resulting yellowness.
Tip: Keep in mind that rabbit fur is very sensitive to chemicals, so it must be dyed with extreme care.
Preparation
In order for you to get a very good effect, the fur product must be prepared for painting. Then the paint will lie much more evenly and there will be no bald spots. The most important thing is a good fur coat or vest.
To do this, prepare a mixture of the following substances:
- 2 tbsp. l. salt;
- 1 st. l. ammonia;
- 2 tbsp. l. soda;
- 1 st. l. washing powder;
- 2 liters of warm (not hot) water.
All components must be mixed and gently applied to the resulting mass of clothing. Gently brush the villi with a brush so that not only the upper, but also their lower part is cleaned. Moisten then a clean cloth with water and wipe the fur from the composition.
After such cleaning, the thing must be dried naturally, without using either heaters or a hair dryer. It is also not recommended to leave the product in direct sunlight.
How to dye fur yourself
How can fur be dyed? This quite natural question arises for many people who want to change the colors of mink, rabbit or arctic fox fur at home. Of course, there are some very real home coloring technologies.

Professional tool
You can use a special paint for fur, which is sold in hardware stores. It lies very naturally on the villi, as it is designed taking into account the characteristics of animal furs.
Hair dye
A more affordable option is . This is also the most popular coloring method, because you can choose any color from a huge palette.
Important: Keep in mind that fur should always be dyed in a darker shade. Over time, the fiery red color will turn into “rusty” or red, and black will fade to a dirty brown.
So, how to change the color of fur with hair dye:
- mix all the paint components according to the instructions.
- put on gloves.
- treat the mezdra (skin) with baby cream, glycerin or petroleum jelly to avoid drying it out;
- moisten the pile so that the paint is distributed more evenly;
- apply paint with a brush to the entire fur surface;
- remember the fur with your hands a little;
- wait 35-45 minutes;
- wash off the paint with water;
- lay the thing on a horizontal plane, wring out excess moisture with your hands, and leave to dry;
- after drying, comb the item.
You can paint the fur not completely, but only the tips of the villi. As a rule, they are lightened to give the product a richer look.
Suede paint
You can treat the faded tips of the villi with suede paint, which is sold in aerosol cans. To do this, place the can at a distance of at least 0.5 meters from the thing and evenly paint the entire surface. Leave the fur to dry for a while, and then rinse it thoroughly.
After that, prepare a fixing solution: 5 tbsp. l. vinegar to 2 liters of water. Wipe the pile with this liquid and leave it to dry.
Hydrogen peroxide
If the fur product is already dark, but you would like to dye it in a bright and saturated shade, then you can discolor it. Hydrogen peroxide tablets or hair bleach will help in this matter.
Peroxide is diluted with water in a ratio of 1:3. If you use a clarifier, then dilute it as written in the instructions. Different manufacturers can produce clarifiers of different concentrations. Apply the prepared mixture on the fur and leave for 10-15 minutes. It is impossible to keep the composition on the pile longer, as the hairs can become brittle. After processing, rinse the fur with water and dry naturally. It will be possible to paint it only after complete drying.
When deciding to lighten and dye the fur of a collar, hat or other thing, carefully select the color, because it will be undesirable to carry out these procedures again. Not a single, even the highest quality pile, can withstand repeated staining.
When dyeing fur, it is important to know some of the nuances:
- The fur that you decide to dye should not be too shabby.
- Only a clean pile will stain well, so it must be preliminarily cleaned.
- Yellowed white fox fur can simply be lightened.
- Before applying any coloring agent, be sure to test it on an inconspicuous area.
- When painting, you can hide some flaws and defects.
- Instead of full-fledged paints, sometimes you can use small folk tricks. For example: the fur of a red or steppe fox can be quickly and painlessly updated with a strong solution of potassium permanganate. In this case, use a small sponge. It must be dipped into the solution and carried out through the villi, trying not to touch the core.
- After dyeing and drying, the fur must be combed so that it becomes fluffy again.
- With the help of tinting shampoo, you can make a unique decor on your fur product. It just takes a little imagination.
Now you know whether it is possible to dye the fur of arctic fox and other fur-bearing animals, and also imagine the technology of this process. The main thing is to strictly follow all the instructions. And your favorite and cozy fur coat will delight you for some time with its warmth and impeccable appearance. If you do not dare to take such a crucial step as dyeing fur, then contact the specialists in dry cleaning or a workshop for repairing fur products.
tweet
Fur products have always been distinguished by their invulnerability to high temperature differences and other environmental factors, but sooner or later the fur on them can fade, lose its former luster, become stained or simply shed. However, the loss of color in a fur coat is not a sentence at all, and it is possible to restore its former brightness without resorting to specialists. And today we will look at how to dye natural fur (for example, mink and arctic fox) and artificial fur in the most effective ways.
We paint fox fur products
In case of very strong contamination or discoloration, it is necessary to treat its surface with some kind of alkaline solution. Coloring elements do not get into the structure of oily or dirty hair. Therefore, to achieve an impeccable result, you need to make an appropriate solution. The cleaner is prepared as follows:
- 2 teaspoons of salt are added to 1 liter of water.
- 1 teaspoon of ammonia and the same amount of detergent.
- 2 teaspoons baking soda
The resulting substance should be applied to the fur with a brush. This product dries naturally.

When processing the inside of the fur coat, it should first be treated with glycerin or a fat cream. This is done to prevent it from drying out.

What color is better to choose?
The answer to this question is ambiguous. In any case, the final choice is yours. However, experts recommend painting the arctic fox in dark colors. If you want to dye your fur coat a lighter shade, pre-treat it with hydrogen peroxide.
Before dyeing the fur at home, you need to thoroughly moisten the fur coat in water. The usual hair dye is applied to the surface of the fur. It is not worth delaying the application of this substance. Do not forget about safety measures - use rubber medical gloves when working. They can be purchased at almost any pharmacy individually or in a package of 100 pcs. When applying paint to the fur, smooth the fur coat with your hand - so the substance will spread more evenly over the surface. After that, it is necessary to withstand the product for several minutes (as indicated on the paint instructions). Next, rinse the fur in warm water. It is best to add vinegar there. Now you can move on to drying. So that the fur does not “sit down” in the future, gently stretch it. Pin it with pins if necessary.

How to dye mink fur?
Mink fur is very close in its structure and appearance to human hair, so it should only be dyed with an aerosol or spray gun at a distance of at least 50 and no more than 80 centimeters from the surface. In order for the paint to be well absorbed into the material, it is necessary to carefully comb it after each application of a new layer. With the help of a comb, the paint is more evenly distributed over the surface of a fur coat and other fur products, as a result of which they will look fresh and attractive. As we noted earlier, mink is very similar in structure to human hair. Because of this, it is necessary to select a paint for it that would not harm its qualities. It is best to use a material that has been tested on your curls, that is, ordinary hair dye. This is sold in almost every supermarket and market. The range and variety of colors will satisfy even the most capricious fashionista, so choose the appropriate option, and then feel free to apply paint on a fur coat.
Drying
As for drying, such restored products can be processed with an ordinary home hair dryer. In this case, you should periodically comb the fur so that in the future it does not fall off. To add shine to the coat, use a hair balm. It will soften the fur well and make its color more saturated.

How to dye faux fur?
First of all, you need to decide what color you will paint this fur. Although, in general, the principle of work does not differ from whether you repaint the fur coat radically or process its surface only partially. The difference is only in time.
How to dye faux fur? As in the case of natural, hair dye will be the best remedy. If you want to make the color of your fur coat dark or light (that is, one that is very different in shade from the true one), use persistent options. If you are going to process the fur only partially, a regular tinting shampoo is quite suitable for such purposes.
So, you bought the right paint. What to do next? Before dyeing the fur at home, you need to thoroughly degrease the surface of the fur coat and remove all dirt from it. To do this, use a cotton swab previously moistened with detergent or shampoo. And one more thing - before staining, it is better to check the color of the paint in advance on a piece of paper. Sometimes it happens that the bottle does not match the specified shade. Or you just don't like it. Then you will have the opportunity to change it, and meanwhile the fur coat will not suffer from double "torture".
How to dye fur at home? When applying the material to the fibers, make sure that the fur is evenly placed on the surface. To avoid unpainted areas, use a comb (same as with natural products). The material itself is applied with a brush in the direction of the fibers. Thus, the paint will capture not only the upper part of the fur coat, but also its fabric base.

Wait a few minutes until all the pigment is absorbed. The exact time of each paint is different, so always follow the application instructions. After the paint is well absorbed into the fur, rinse it off with water, shampoo if necessary. If the fur coat is easy to wash, you can put it in the washing machine. After that, comb the fibers with a comb and let the product dry. Comb again after drying. If the fabric base of the fur coat is not washable, remove the remaining paint from it with pieces of a cotton swab soaked in warm water.
Conclusion
So, we found out how to dye fur at home, as well as what tools you need to have available for this.
In the process of long-term wear, a fur product may lose its attractiveness only due to the fact that the fur has faded either from the sun or from exposure to precipitation. In this case, there are two ways to restore. Specialized companies that provide dry cleaning and painting services are able to do it efficiently. But you can give a “second life” to your favorite thing at home. Following the instructions and applying a share of your own imagination, you will be able to create a unique work of art.
If the age of the fur product is indicated by its color, then you can update the appearance with the help of painting.
For gray astrakhan, only black or brown is used. The mink is dyed in native colors in order to restore faded shades. Mouton products are suitable for black or brown pigment. Fur things in beige tones are dyed in all shades of brown to enhance the intensity of the native color. Choose a paint one or two shades darker for work.
The main condition for high-quality and uniform dyeing is clean fur. The best cleaning agent proved to be an alkaline solution, its composition is as follows:
- soda (dessert spoon);
- salt (dessert spoon);
- ammonia (a teaspoon);
- about 15 drops of detergent
- 1 liter of water.
Lightening yellowed white fur is an additional element of color restoration. To do this, use a solution with hydrogen peroxide (a teaspoon) and ammonia (10 drops). This tool can remove yellowness from silver fox fur. In the process of processing with such a composition, deep soaking should be avoided. First, a test is made on an inconspicuous area of \u200b\u200bthe product. 15 minutes is enough for lightening. It must be remembered that A longer process will make the tips brittle.
Chalk and starch help to remove yellowness on the fur of a gray rabbit for a while. The powder is evenly and with little effort rubbed over the top of the pile and shaken off. This method will not harm the product, so you can use it often. Gray rabbit fur is dyed with hair pigment. There is also an absolutely safe method, in which an aqueous solution of blue is gently applied to the entire surface of the product with a brush. The composition should be light blue.
To ennoble faded raccoon fur, hair dye is used with a brightening effect, as a result of which the product will look gold or silver plated.
You can update the fox fur with thick potassium permanganate. Treat it gently with a sponge, not allowing things to get wet.
The faded ends of the fur are dyed with suede spray paint. Spray the product slowly, keeping a distance of about 70 centimeters between the fur coat and the sprayer.
How to dye fur with hair dye?
For dyeing polar fox or mink on your own, hair dyes are suitable. This method has been tested in practice and always gives positive results when painting not too old things. It is better to check the effect of even high-quality products on a small inconspicuous area of \u200b\u200bthe product.
To dye fur at home, you will need to follow these steps:
- Straightening the strands of natural fur, apply a thin layer of oily cream or glycerin to the mezra.
- Gently moisturize the entire fur surface.
- Apply the product as carefully as when coloring hair.
- Leave for a while. Duration of staining - according to the instructions on the package with the dye.
- To enhance the effect of the paint, a saline solution is evenly applied to the entire surface.
- Wash off the paint under the stream of water from the shower.
- Excess is removed with a rag or blotting paper.
After drying, the fur is combed, observing the natural direction of the pile. Such paint lasts up to six months on a fur product, and this is often enough to make the thing look updated.
A simplified version of tone saturation is coloring with tinting shampoo (in accordance with the instructions on the package).
For coloring with multi-colored paints, home-made stencils are used. The spots are painted alternately.
Faux fur is easier to dye. You can use toning shampoo and hair dye. The sequence of actions is as follows:
- Before staining, the product is fixed.
- Apply the agent in the direction of the fibers.
- Leave the paint to soak in. The time must match the instructions in the instructions.
- After the procedure, the fur is washed, dried and combed.
Experts do not recommend experimenting with staining new things.
Home or professional dyeing extends the life of the fur product for a short time. After some time, the pigment comes off, and the thing becomes faded again.